#1 AWS Marketplace - Setup Guide
Bookstack supports two authentication methods: standard and Google.
The following table compares the two methods. Choose the one that best fits your needs and click the “Go to AWS Marketplace” button.
|
Feature |
Standard Authentication |
Google Authentication (OIDC) |
|
Login Method |
Local username & password |
Google Single Sign-On (SSO) |
|
User Management |
Managed within BookStack |
Users managed via Google Workspace |
|
Security Level |
Standard password-based security |
OAuth 2.0 authentication with Google |
|
Ease of Use |
Requires manual user management |
Seamless login with Google account |
|
Setup Complexity |
No additional configuration required |
🚨 Requires a one-time login as the default admin to grant admin privileges to your Cognito account. By default, Cognito-authenticated users are assigned the Viewer role, and this step ensures that your account receives Admin permissions. |
|
Multi-Factor Authentication (MFA) |
Not built-in, but can be configured |
Supports Google MFA |
|
Best For |
Small teams, personal use |
Enterprises using Google services |
⚠ Important Notice! At this time, BookStack does not support simultaneous use of both Standard Authentication and Google Authentication (OIDC).
To switch authentication methods, you must manually update the .env file and restart the BookStack docker container (detailed instructions will be provided below).
📌 Deploying BookStack via AWS CloudFormation
Follow these steps to deploy BookStack in your AWS infrastructure:
1️⃣ Go to AWS Marketplace
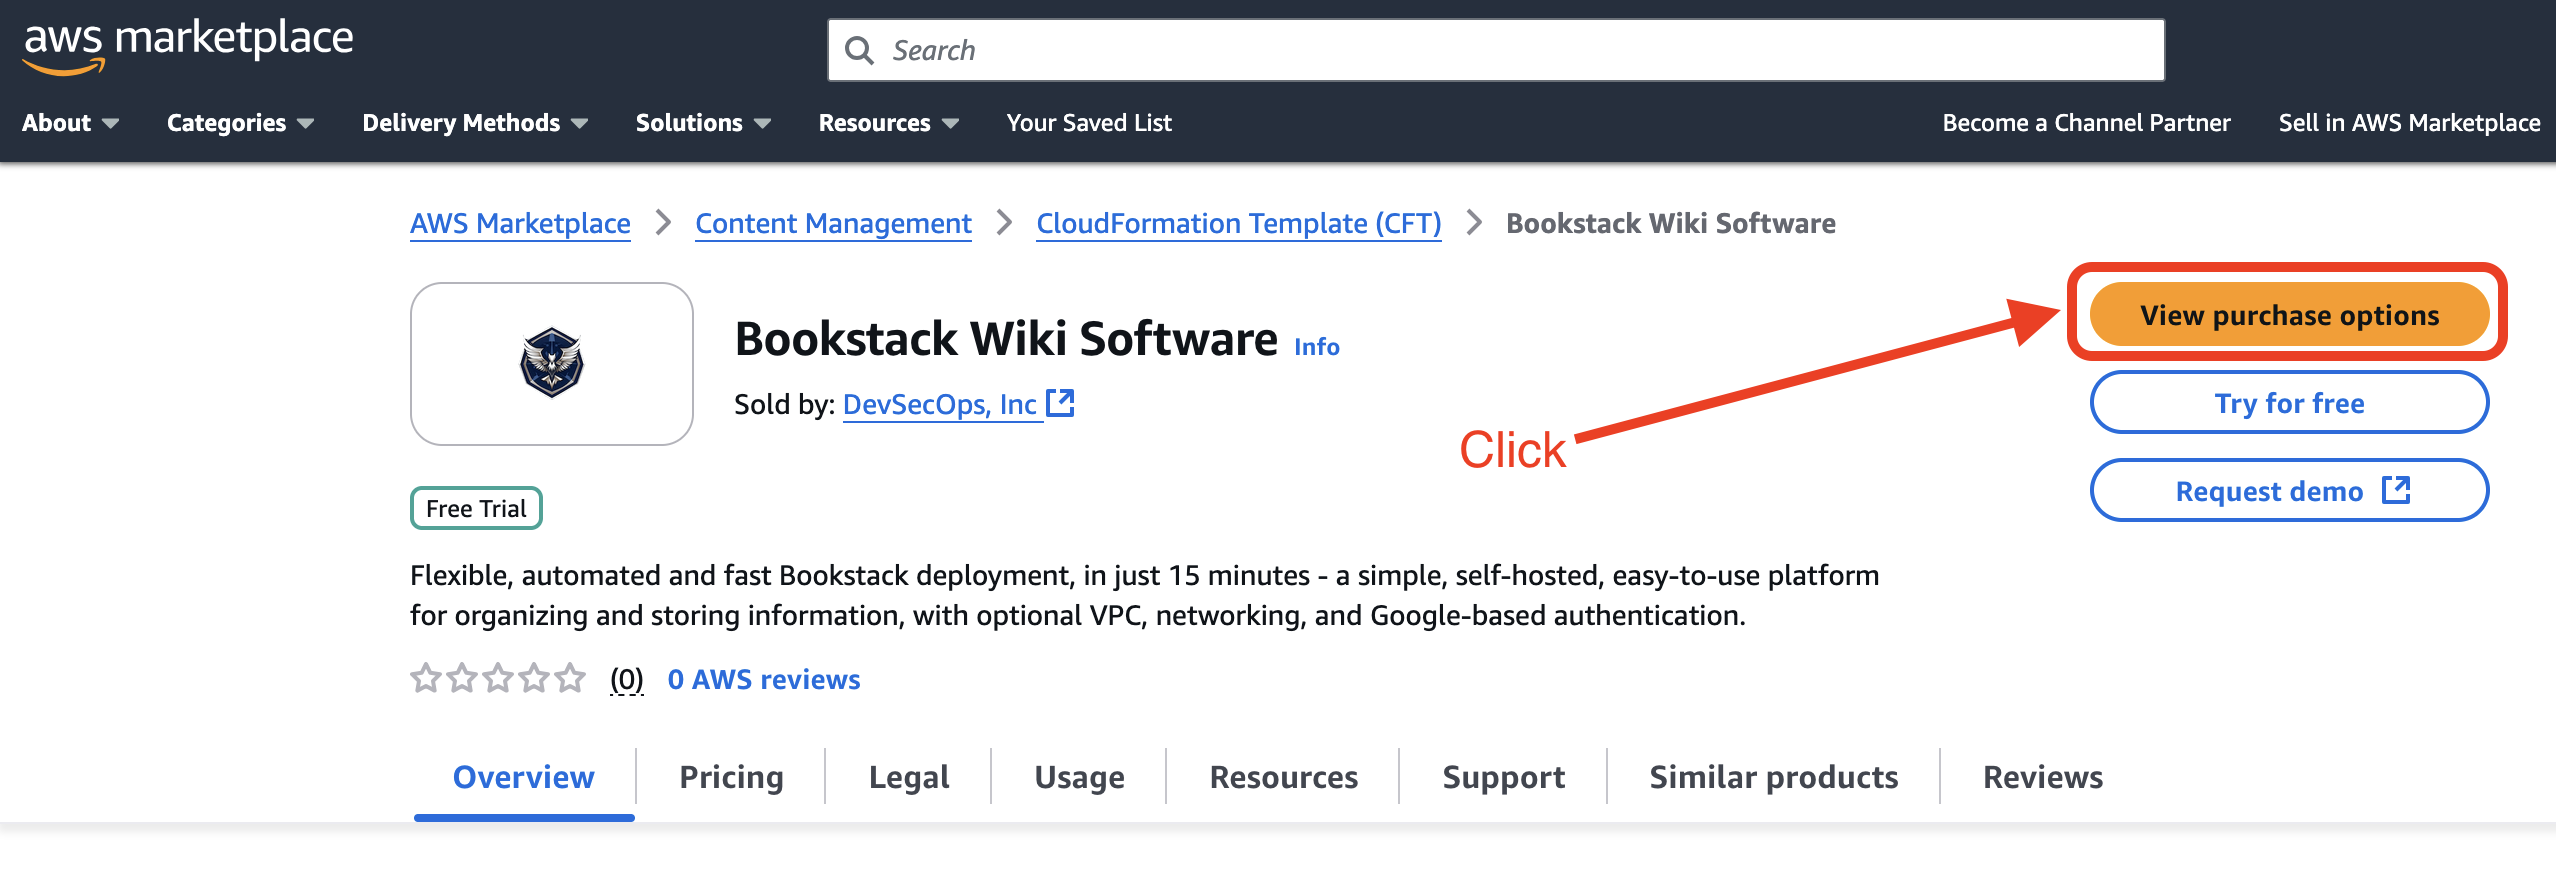
1. Open the BookStack page directly on AWS Marketplace - or type the name of the product Bookstack Wiki Software.
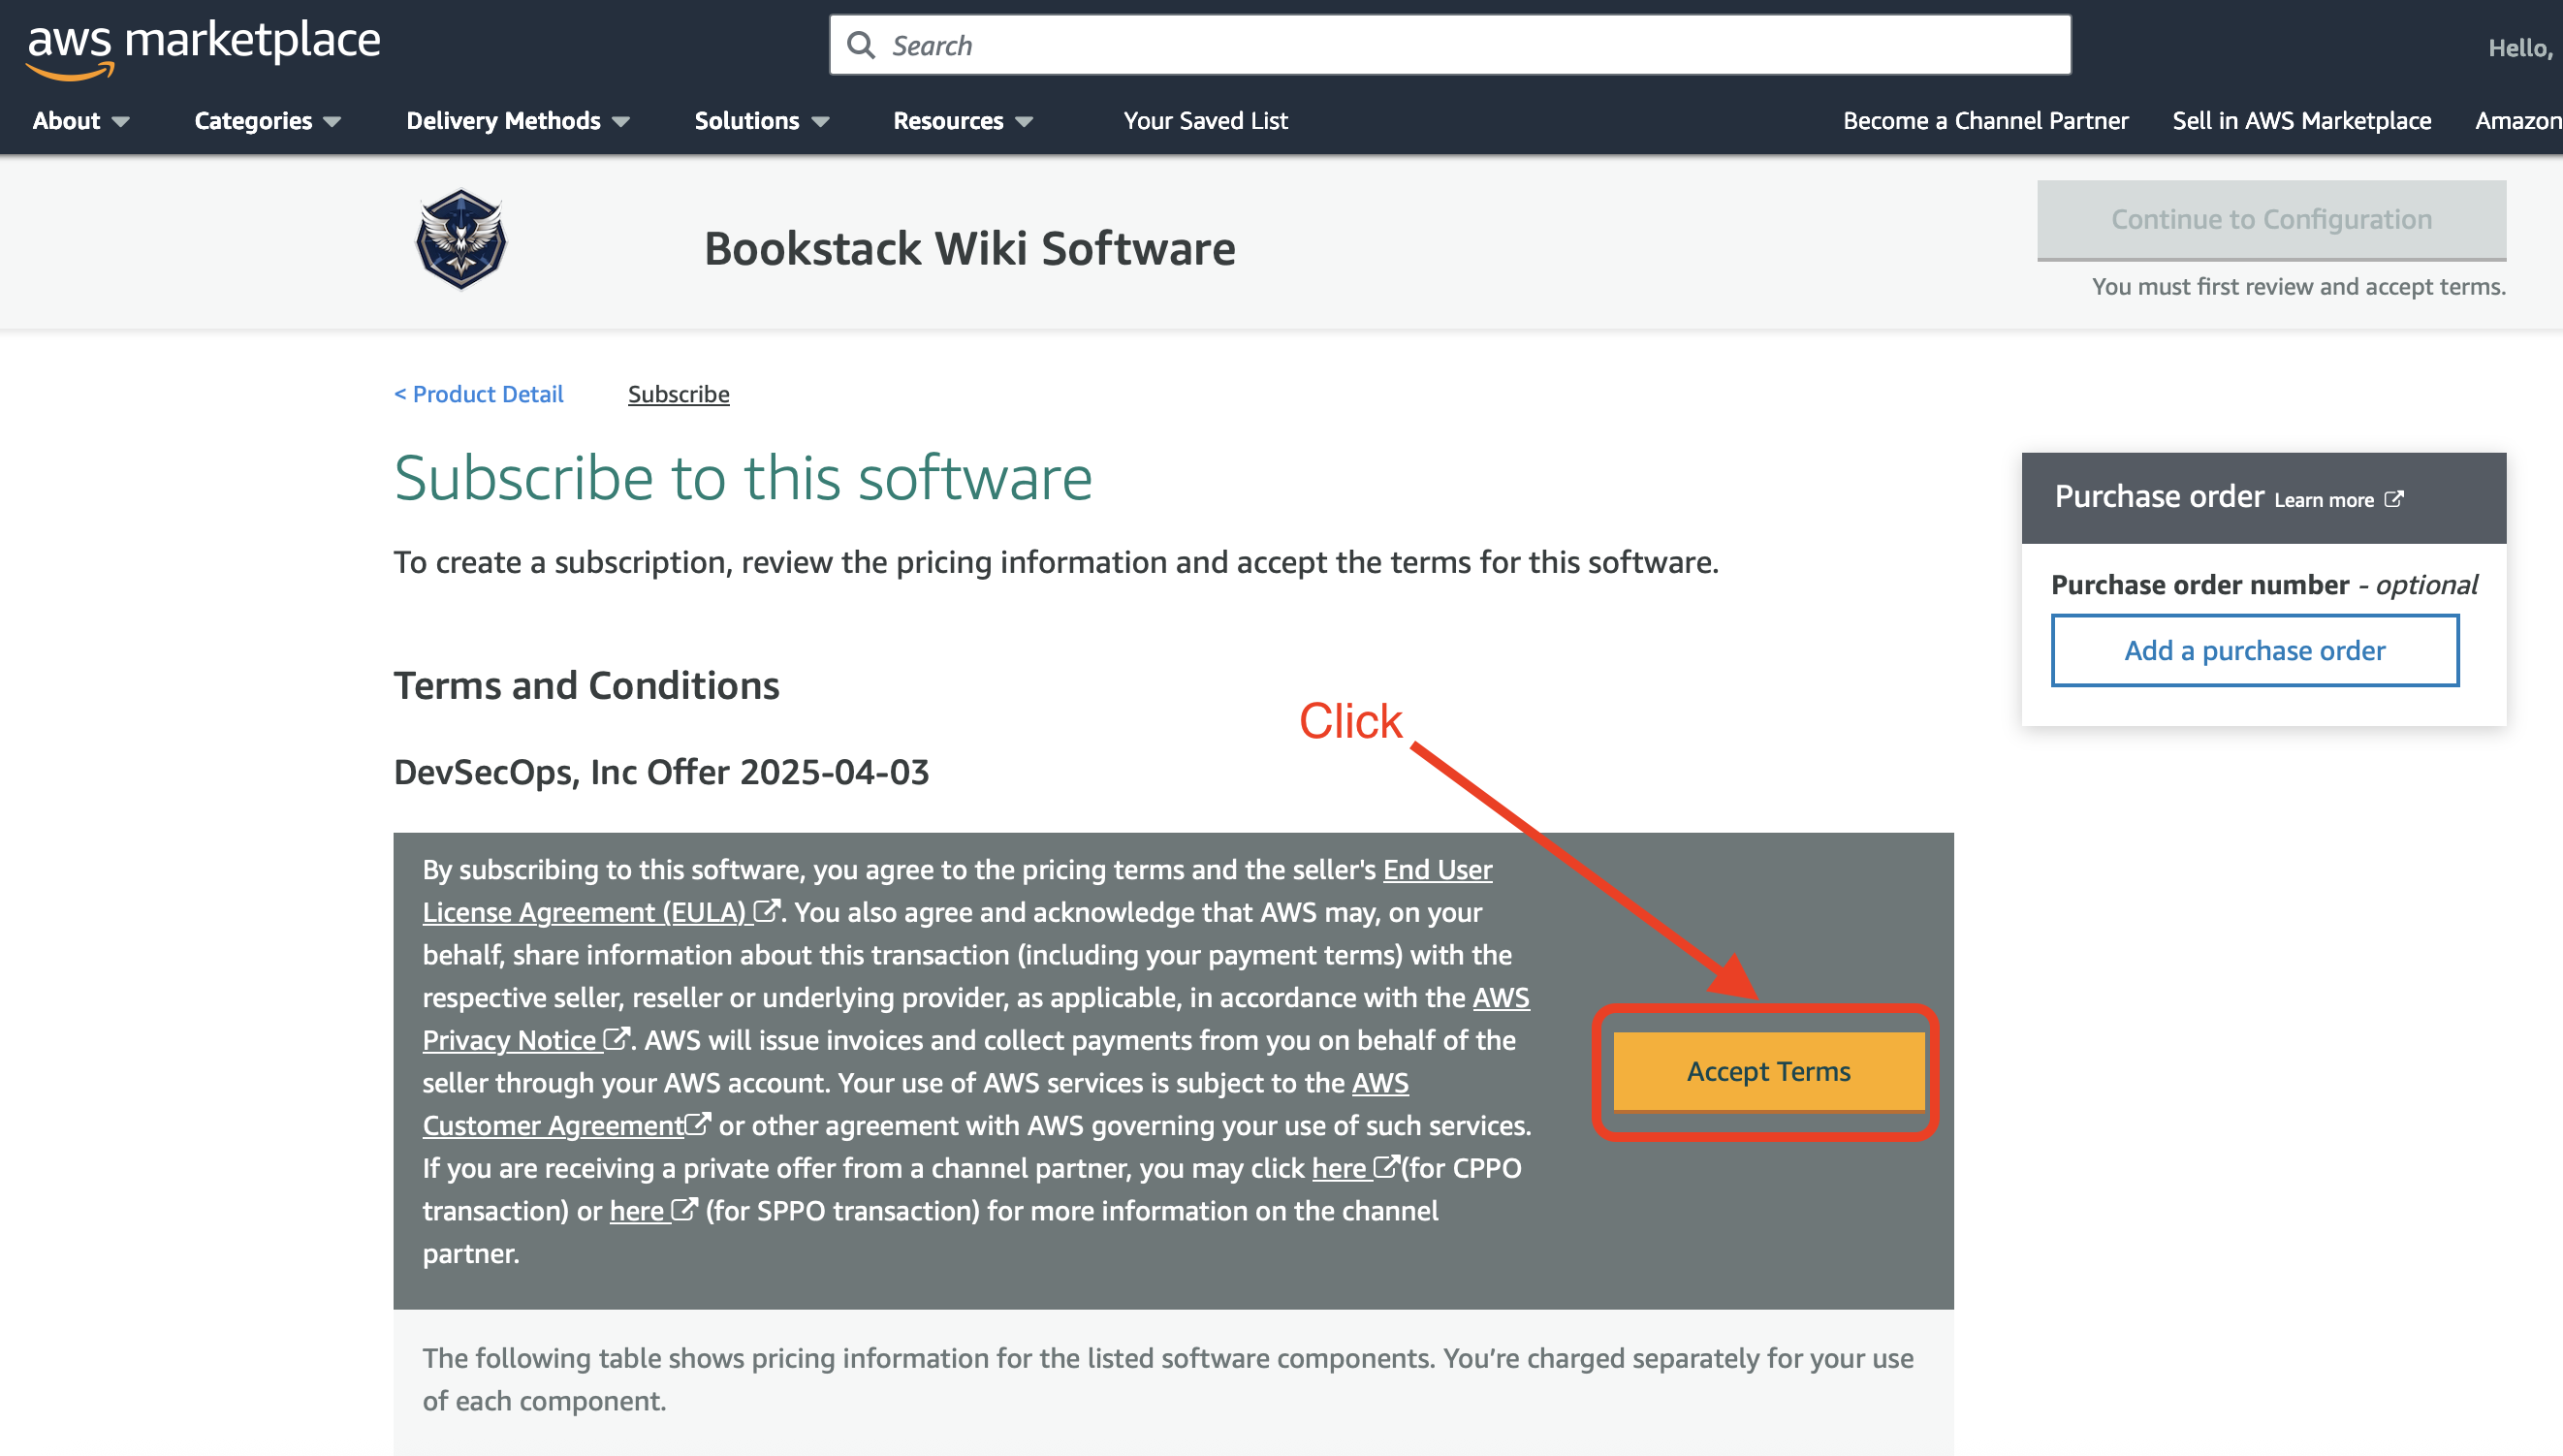
2. Click View purchase options, in appeared page Subscribe to this software review the terms, pricing information and accept the agreement.
3. The subscription is now Pending.
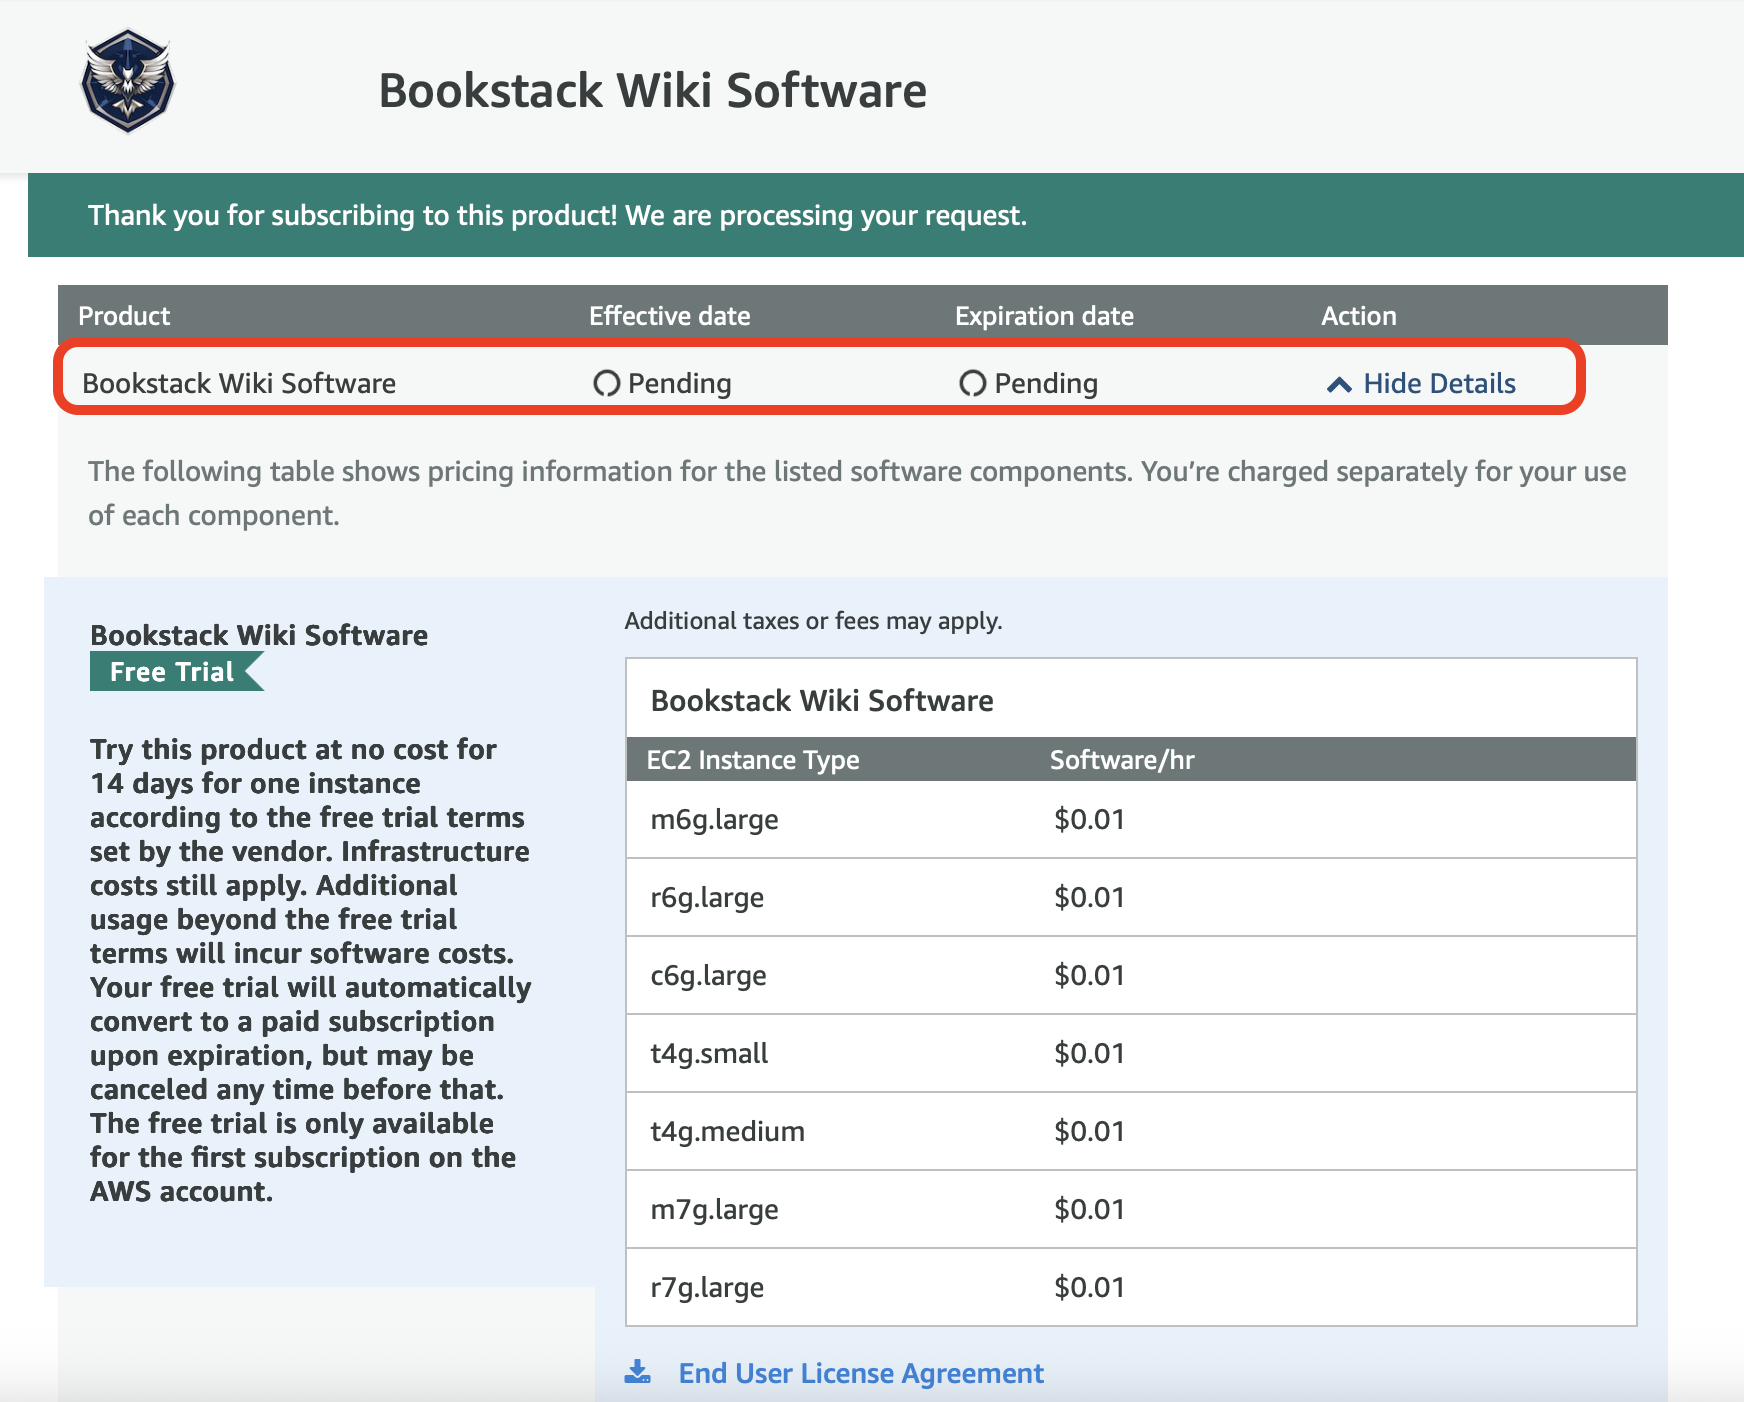
4. Wait until the subscription is active and click on Continue to Configuration.
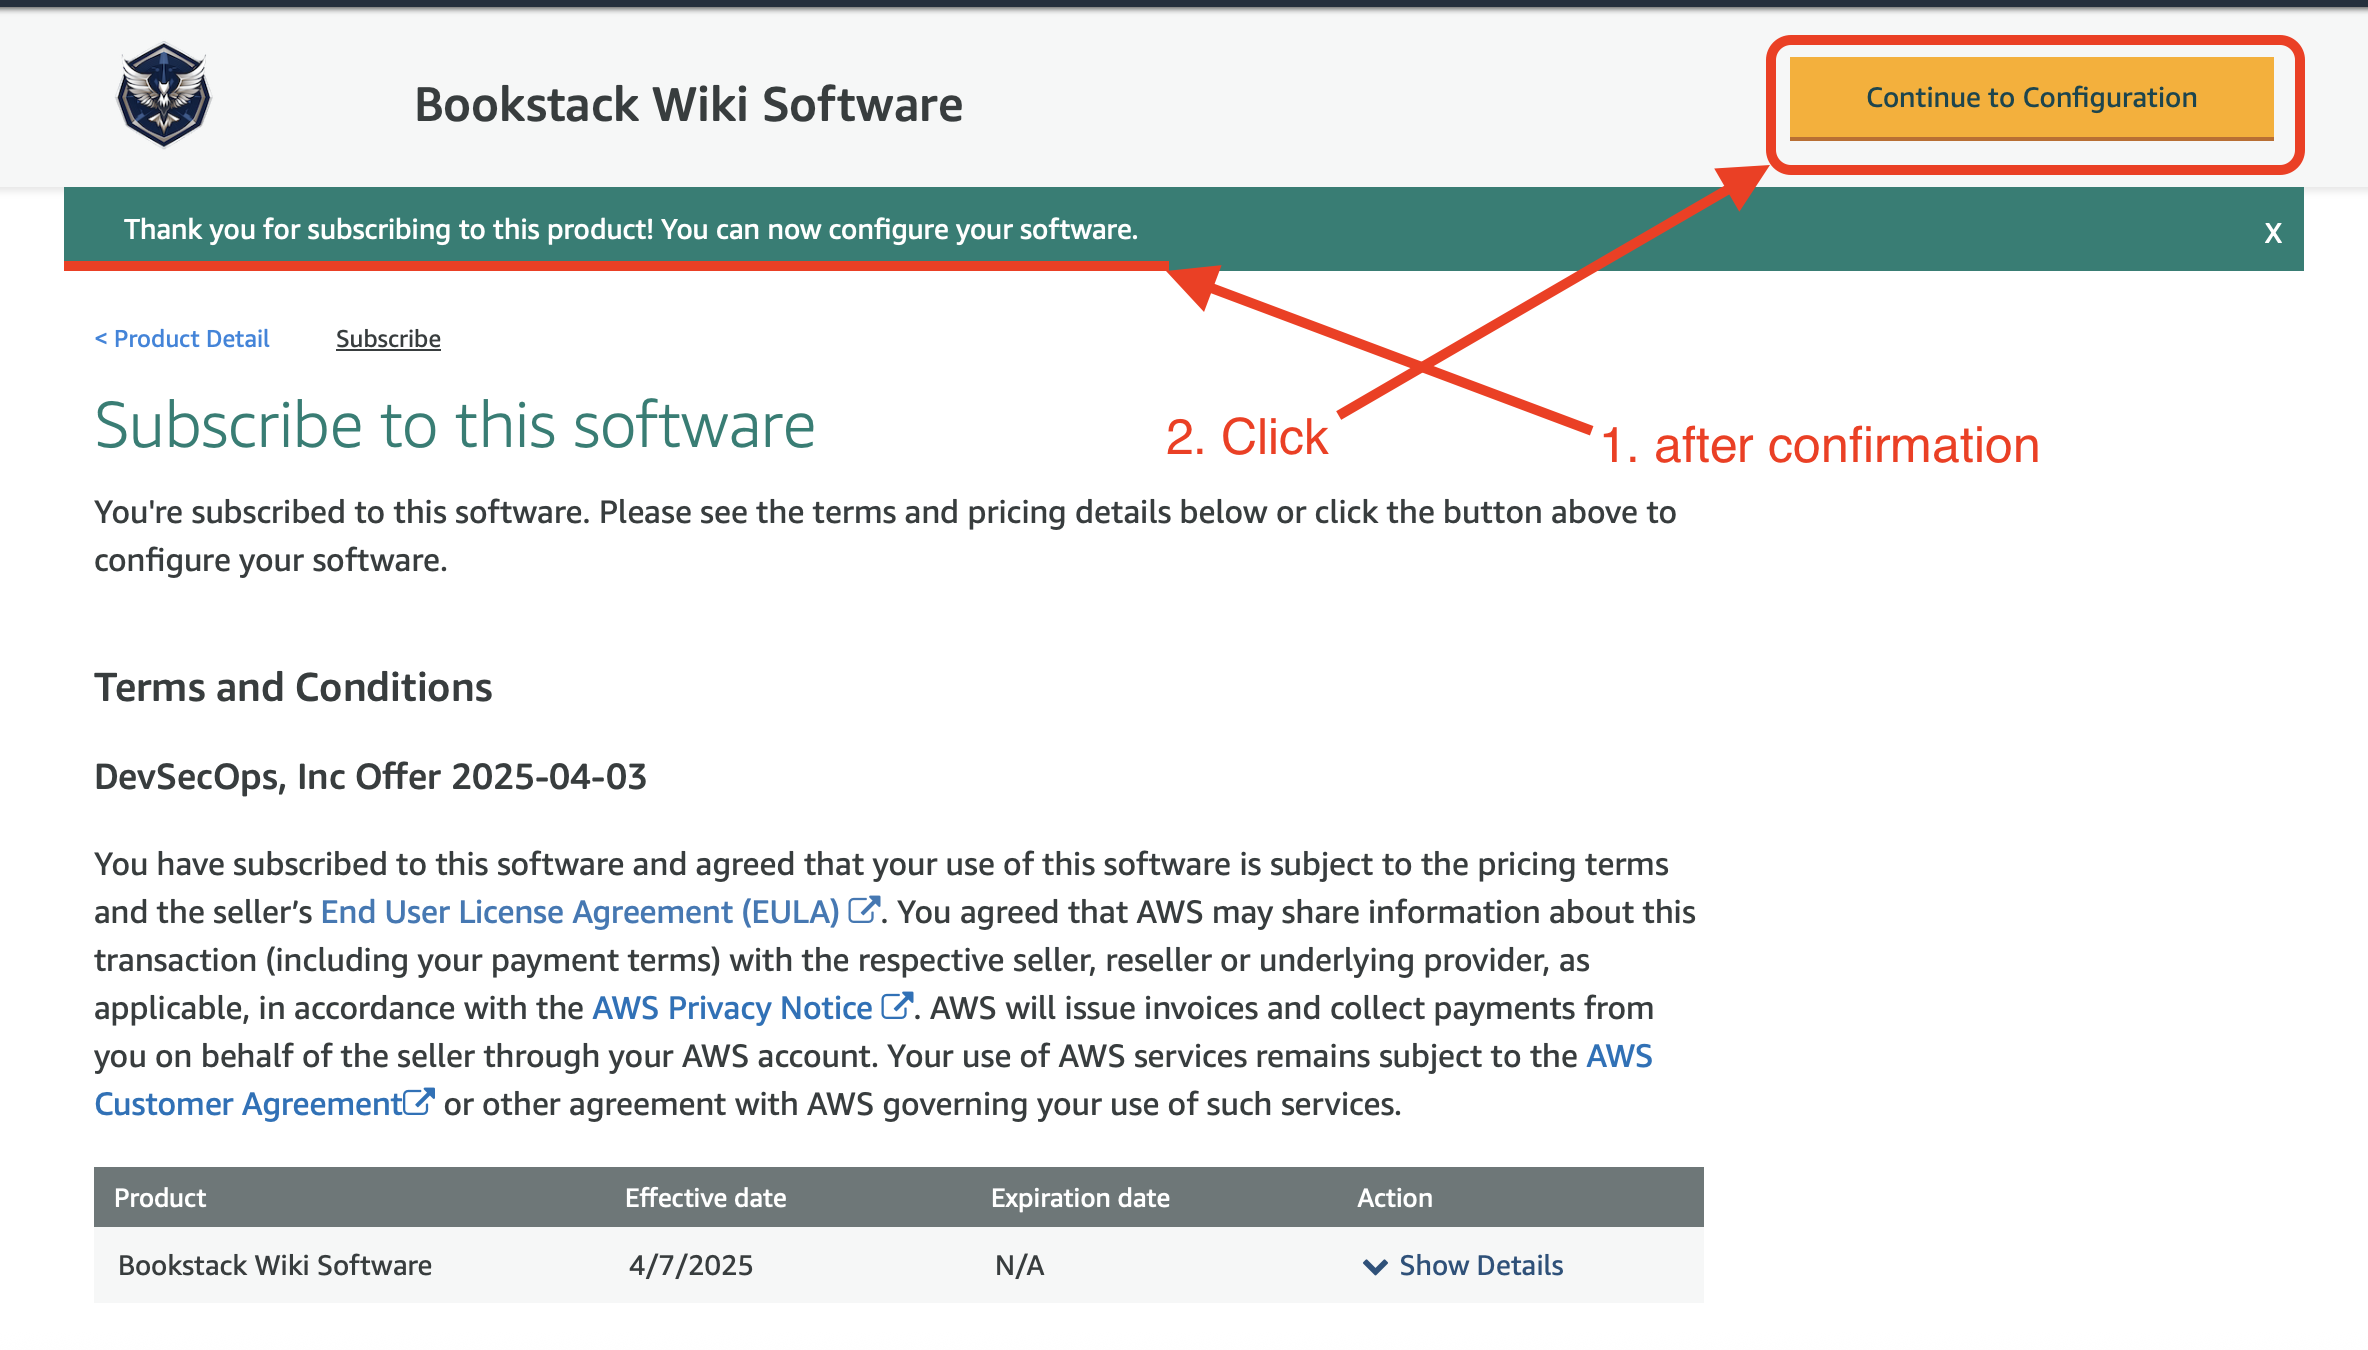
5. Continue with selecting fulfillment option, version, and region.
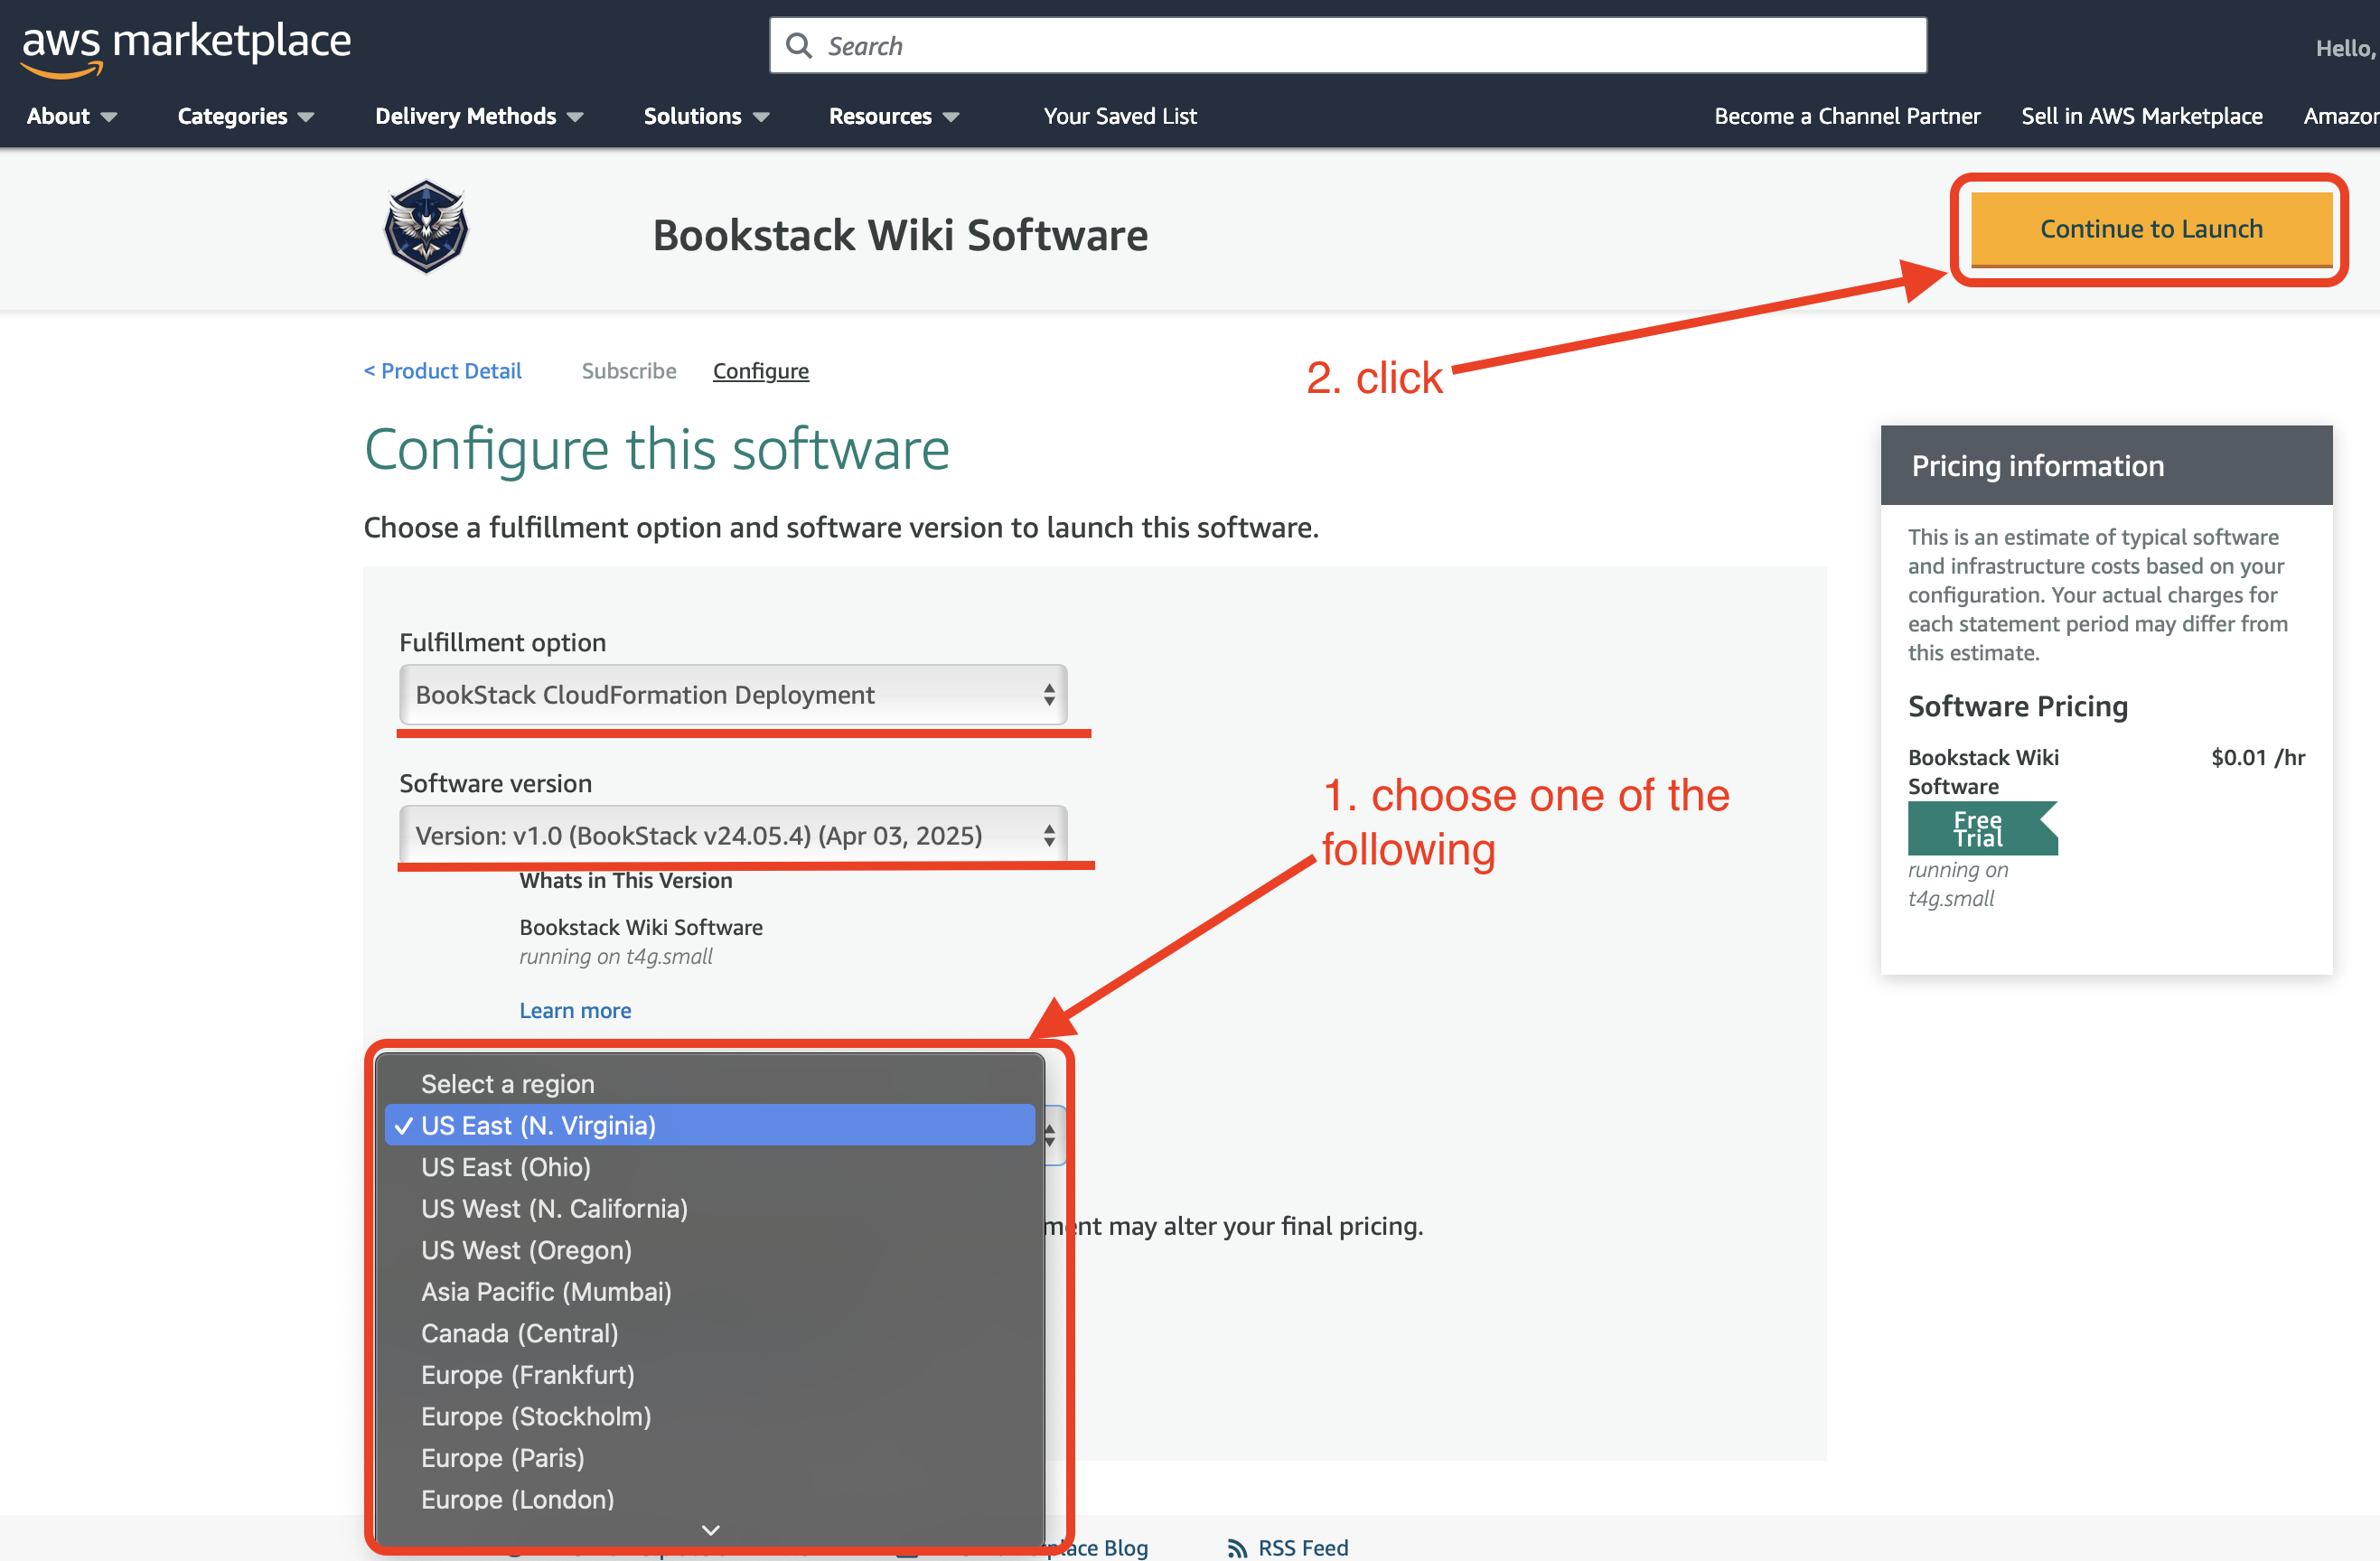
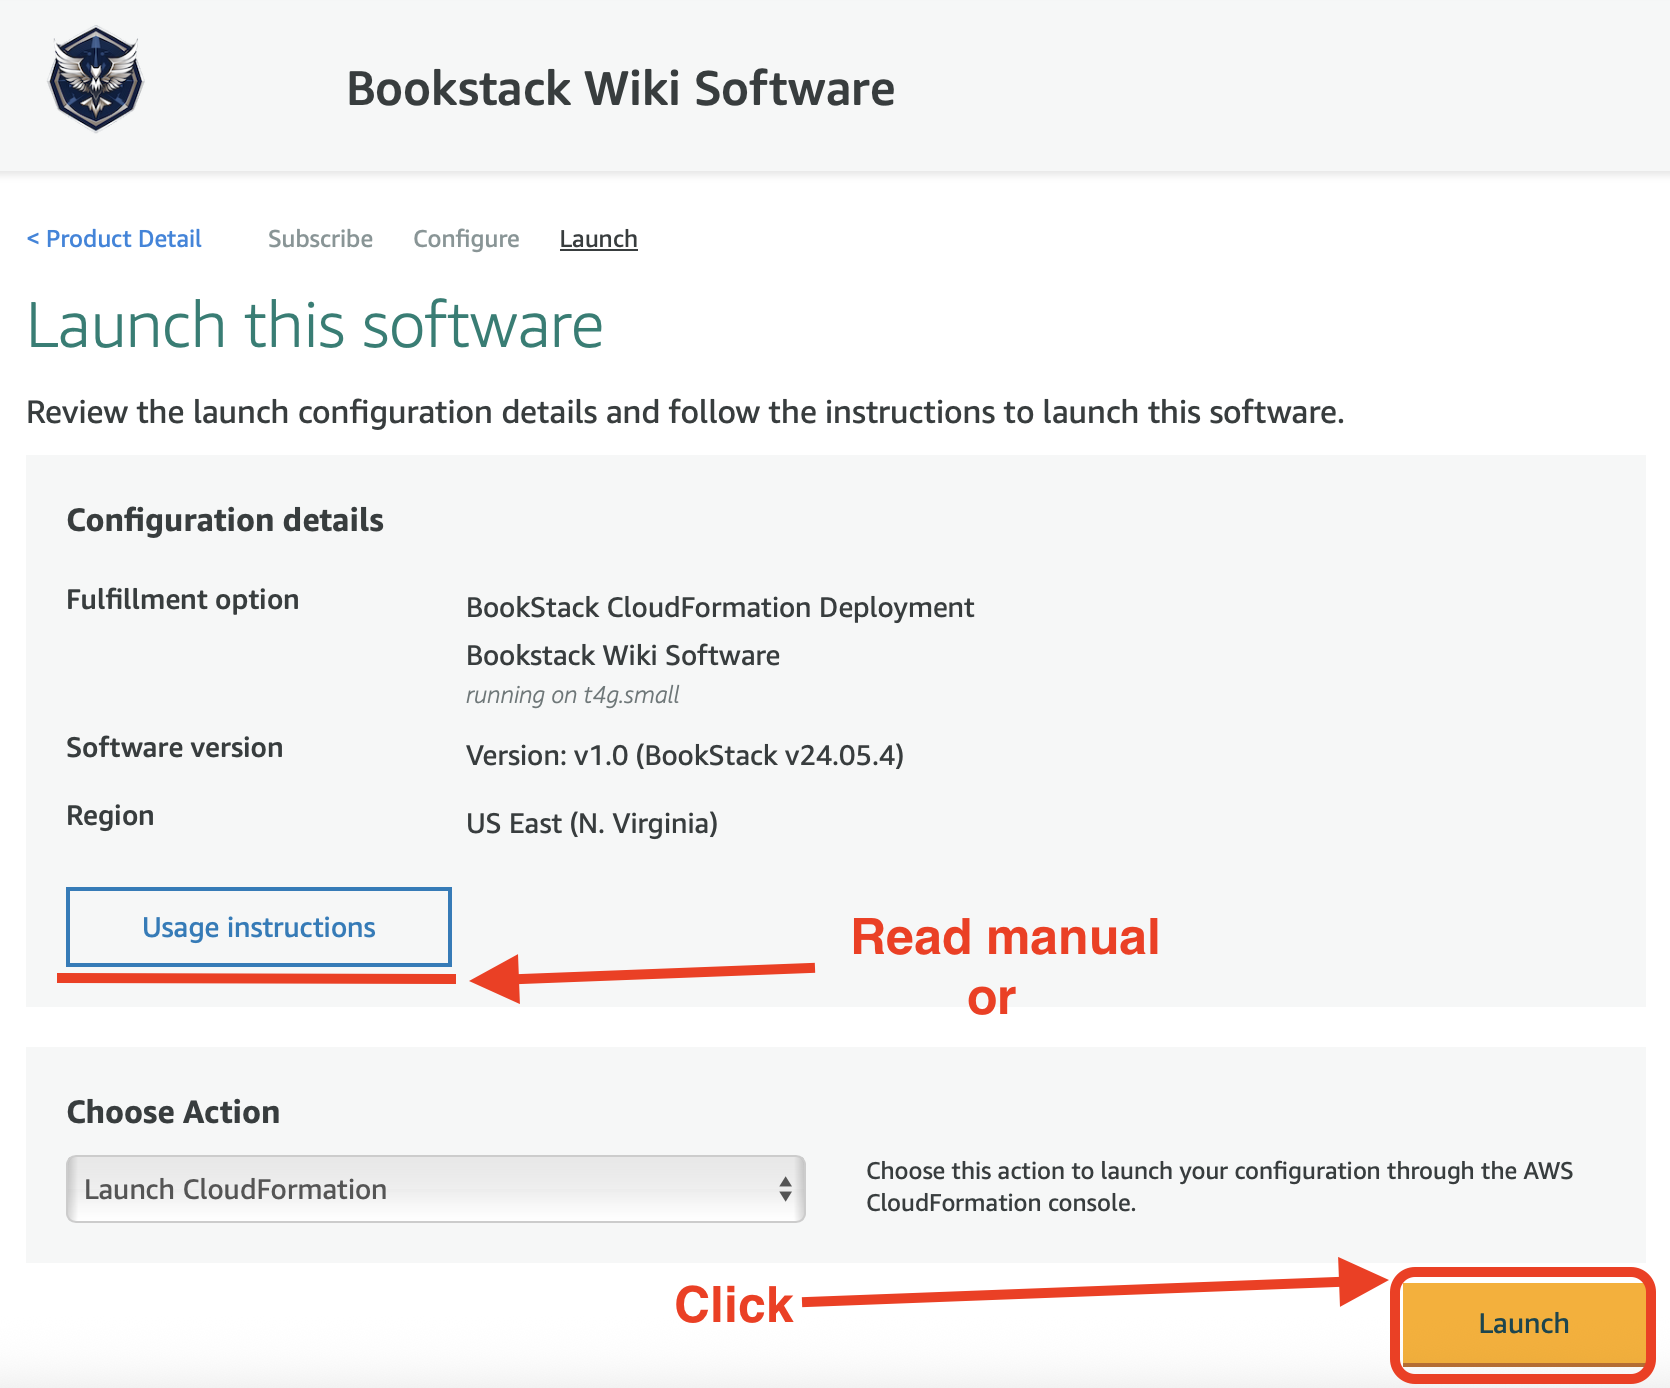
6. Launch. Here, you can read the manual or launch your own wiki.
⚠ Important Notice! We provide three Fulfillment options:
| Fulfillment option | Description | Architecture |
| 1. Bookstack infra without Cognito, default VPC, RDS AutoBackup Off, Single-AZ, EC2. ≈$45.40 | Cost-efficient BookStack deployment utilizing an existing VPC and RDS Single-AZ. AWS Cognito is excluded, but the setup retains EFS Backup, Secrets Manager, Systems Manager, EC2, and CloudWatch Logs for security and monitoring. | Open Diagram |
| 2. Bookstack infra enabled Cognito, default VPC, RDS AutoBackup Off, Single-AZ, EC2. ≈$51.40 | Balanced BookStack deployment utilizing an existing VPC with AWS Cognito for authentication. RDS Single-AZ with AutoBackup disabled ensures cost efficiency, while EFS Backup, Secrets Manager, Systems Manager, EC2, and CloudWatch Logs provide security and monitoring. | Open Diagram |
| 3. Bookstack infra enabled Cognito, new VPC, RDS AutoBackup Off, Single-AZ, EC2. ≈$84.25 |
Optimized BookStack deployment with Cognito authentication, new VPC, and RDS Single-AZ. Includes EC2 instance, EFS Backup, Secrets Manager, Systems Manager, and CloudWatch Logs for enhanced security, scalability, and monitoring |
Open Diagram |
2️⃣ Deployment via CloudFormation
📌 Choosing Parameters
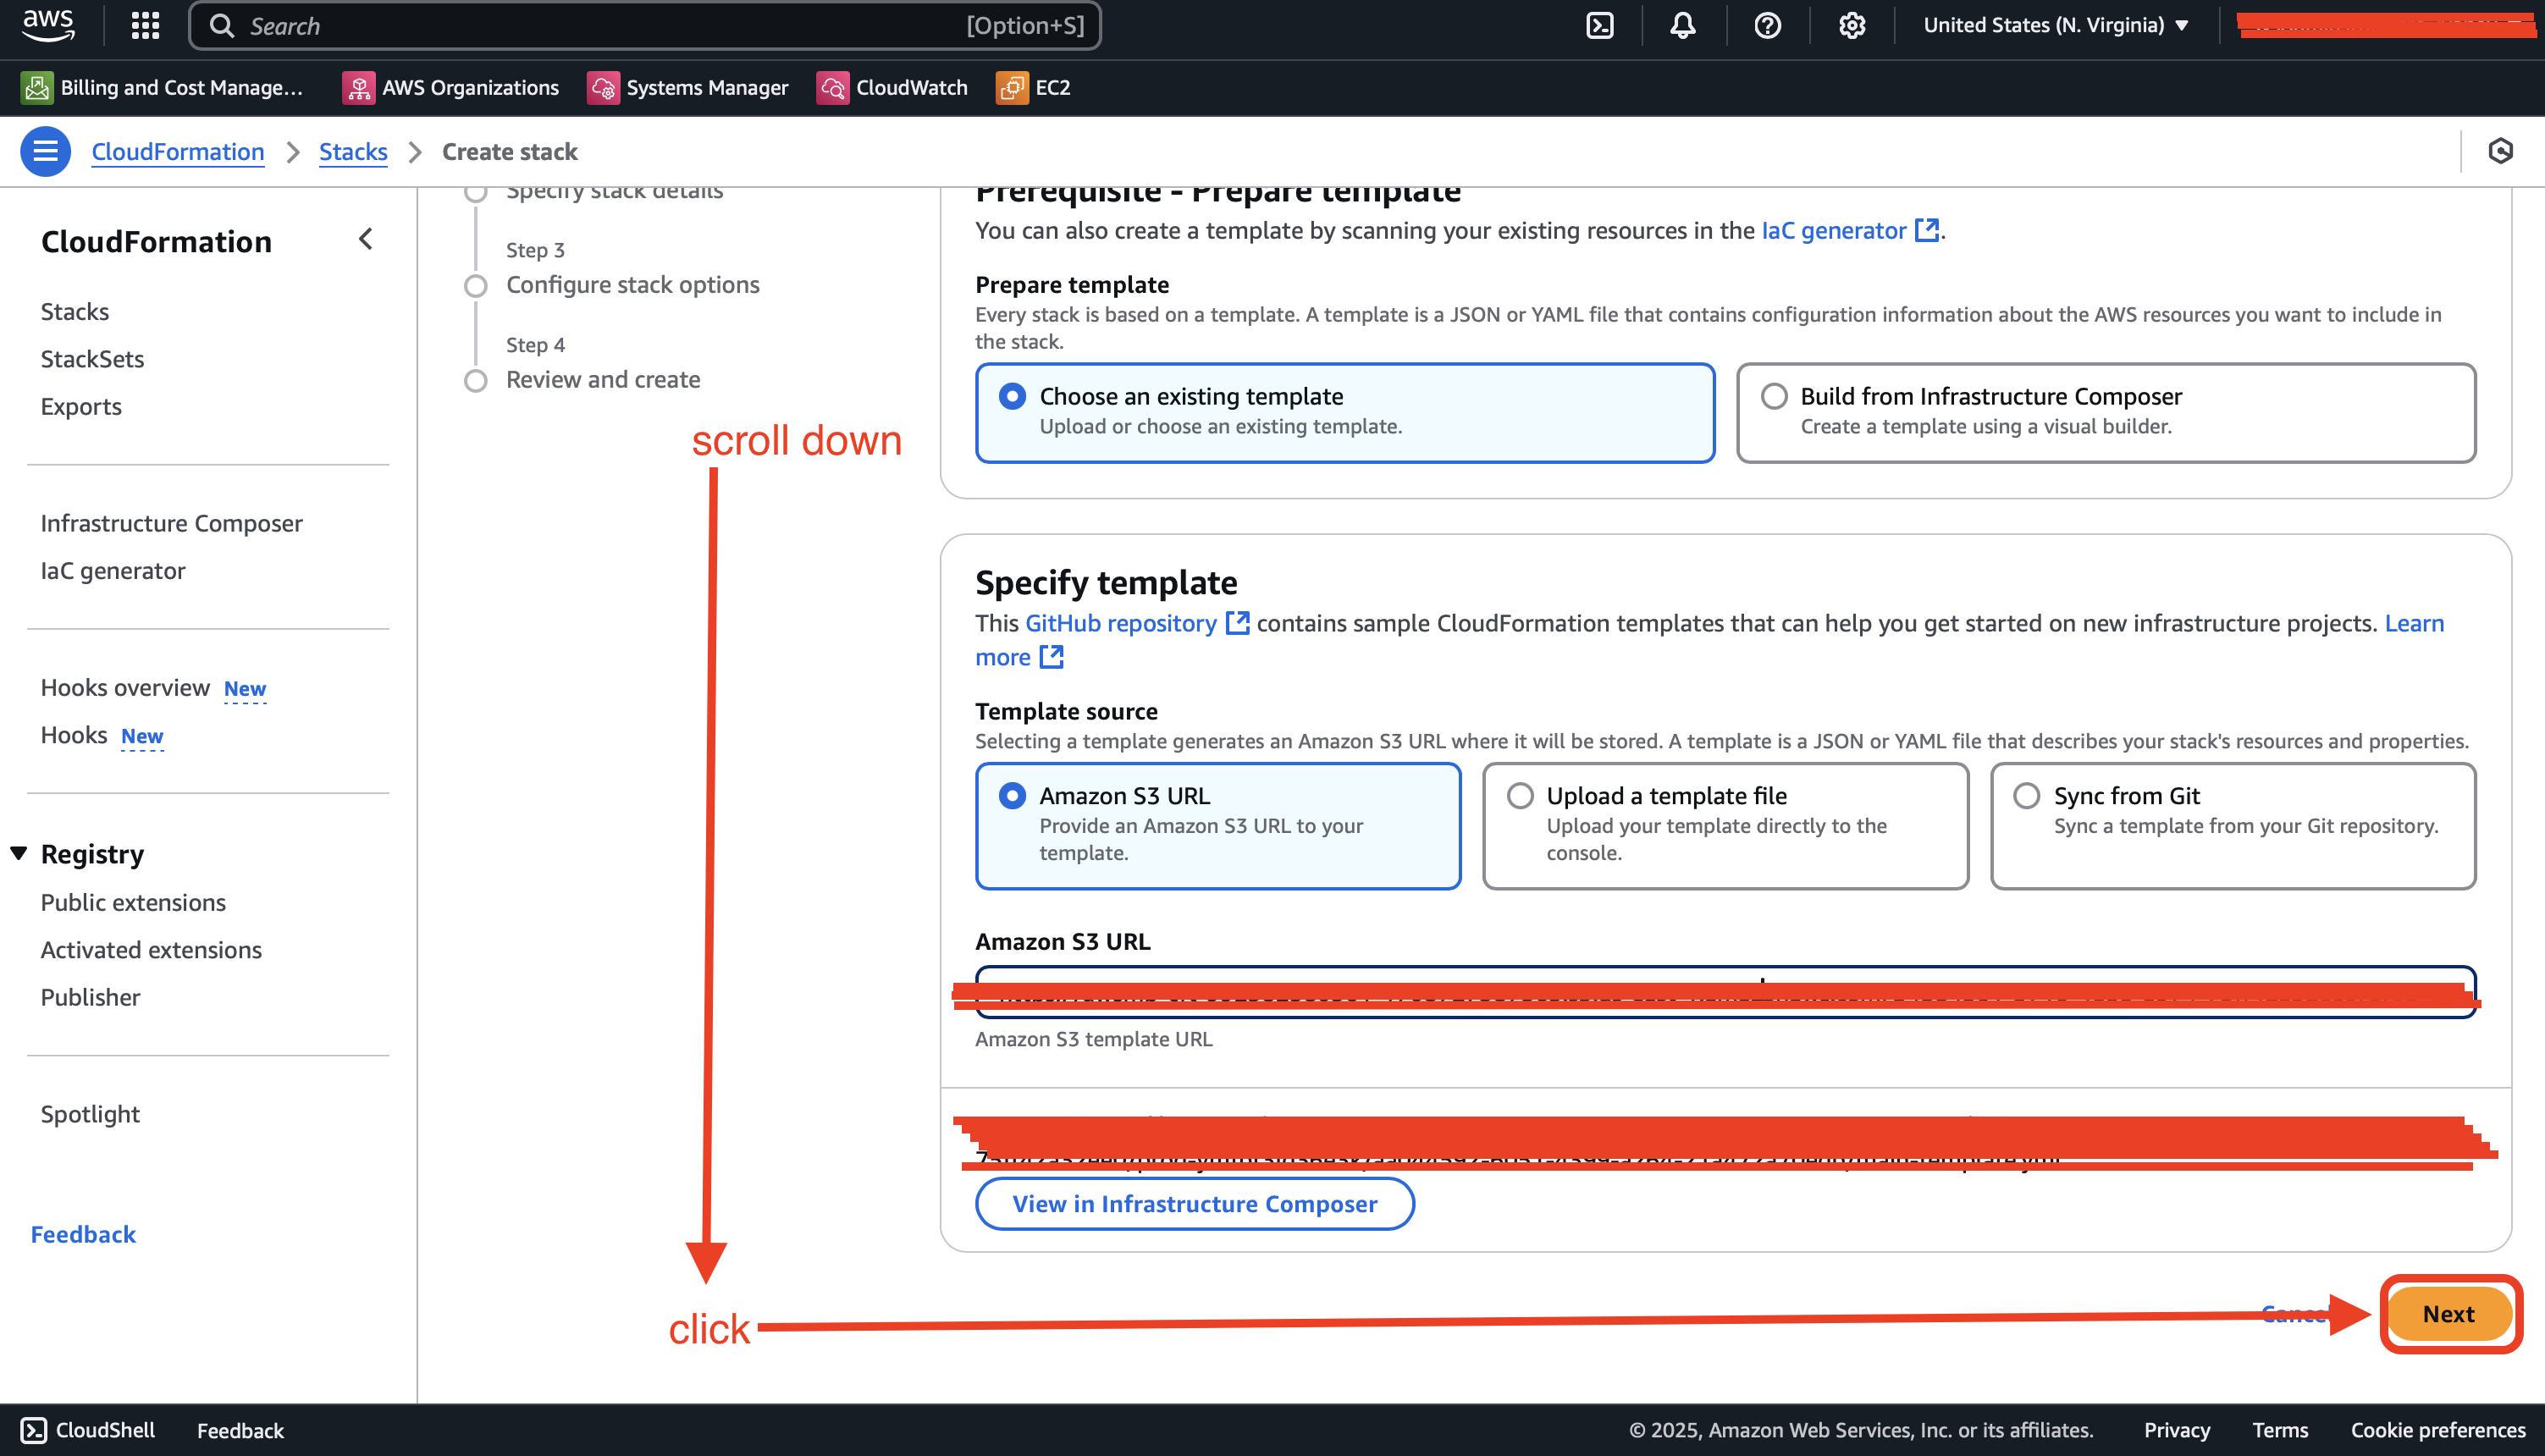
1. You will be redirected to CloudFormation Stack Launch with selected AWS region where you want to deploy BookStack. Click Next.
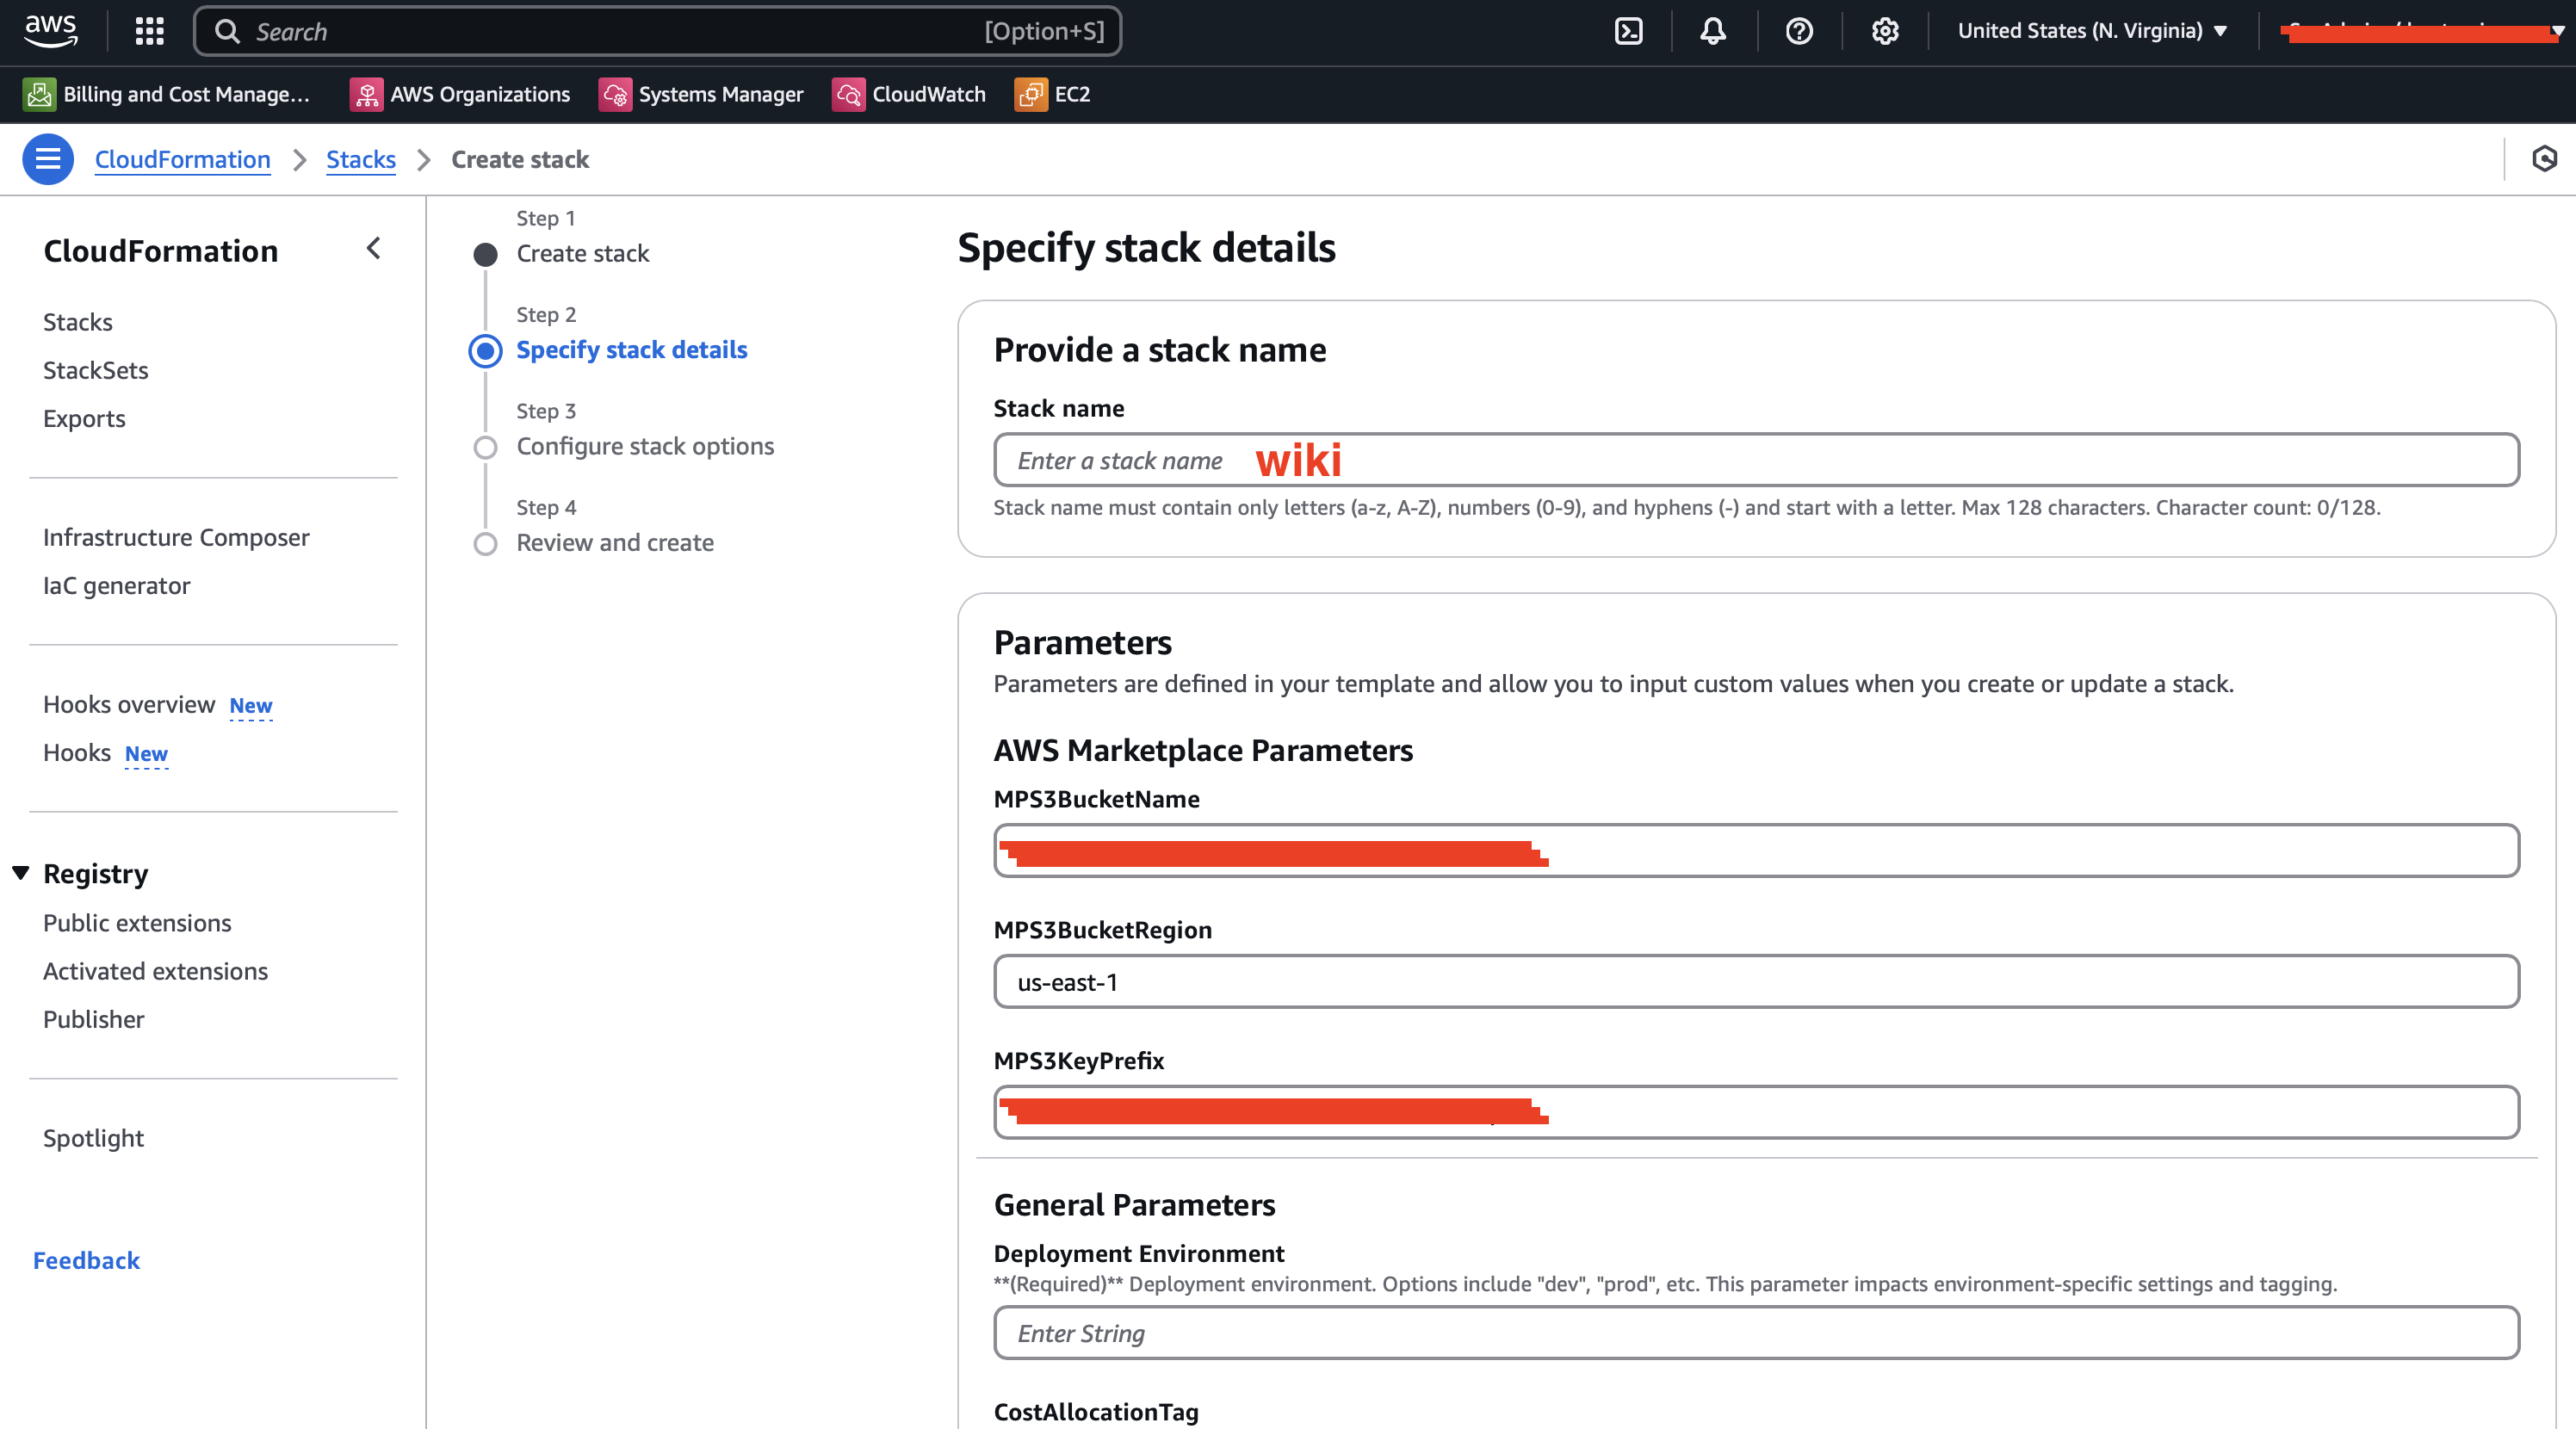
2. Specify stack details. Here, you need to fill in the Stack name. You can choose any name for your stack, but we recommend using a structured format like: bookstack (e.g., wiki, docs, etc.).
For this guide, we will use wiki as an example.
To proceed, please follow this instruction: 2. Configuring Parameters for main stack
No Comments