📌 2. Configuring Parameters for main stack
Step 1. Prerequisite - Prepare template
We did the first step previously, when subscribed for the product in AWS Marketplace - Setup Guide, so move forward to the next step.
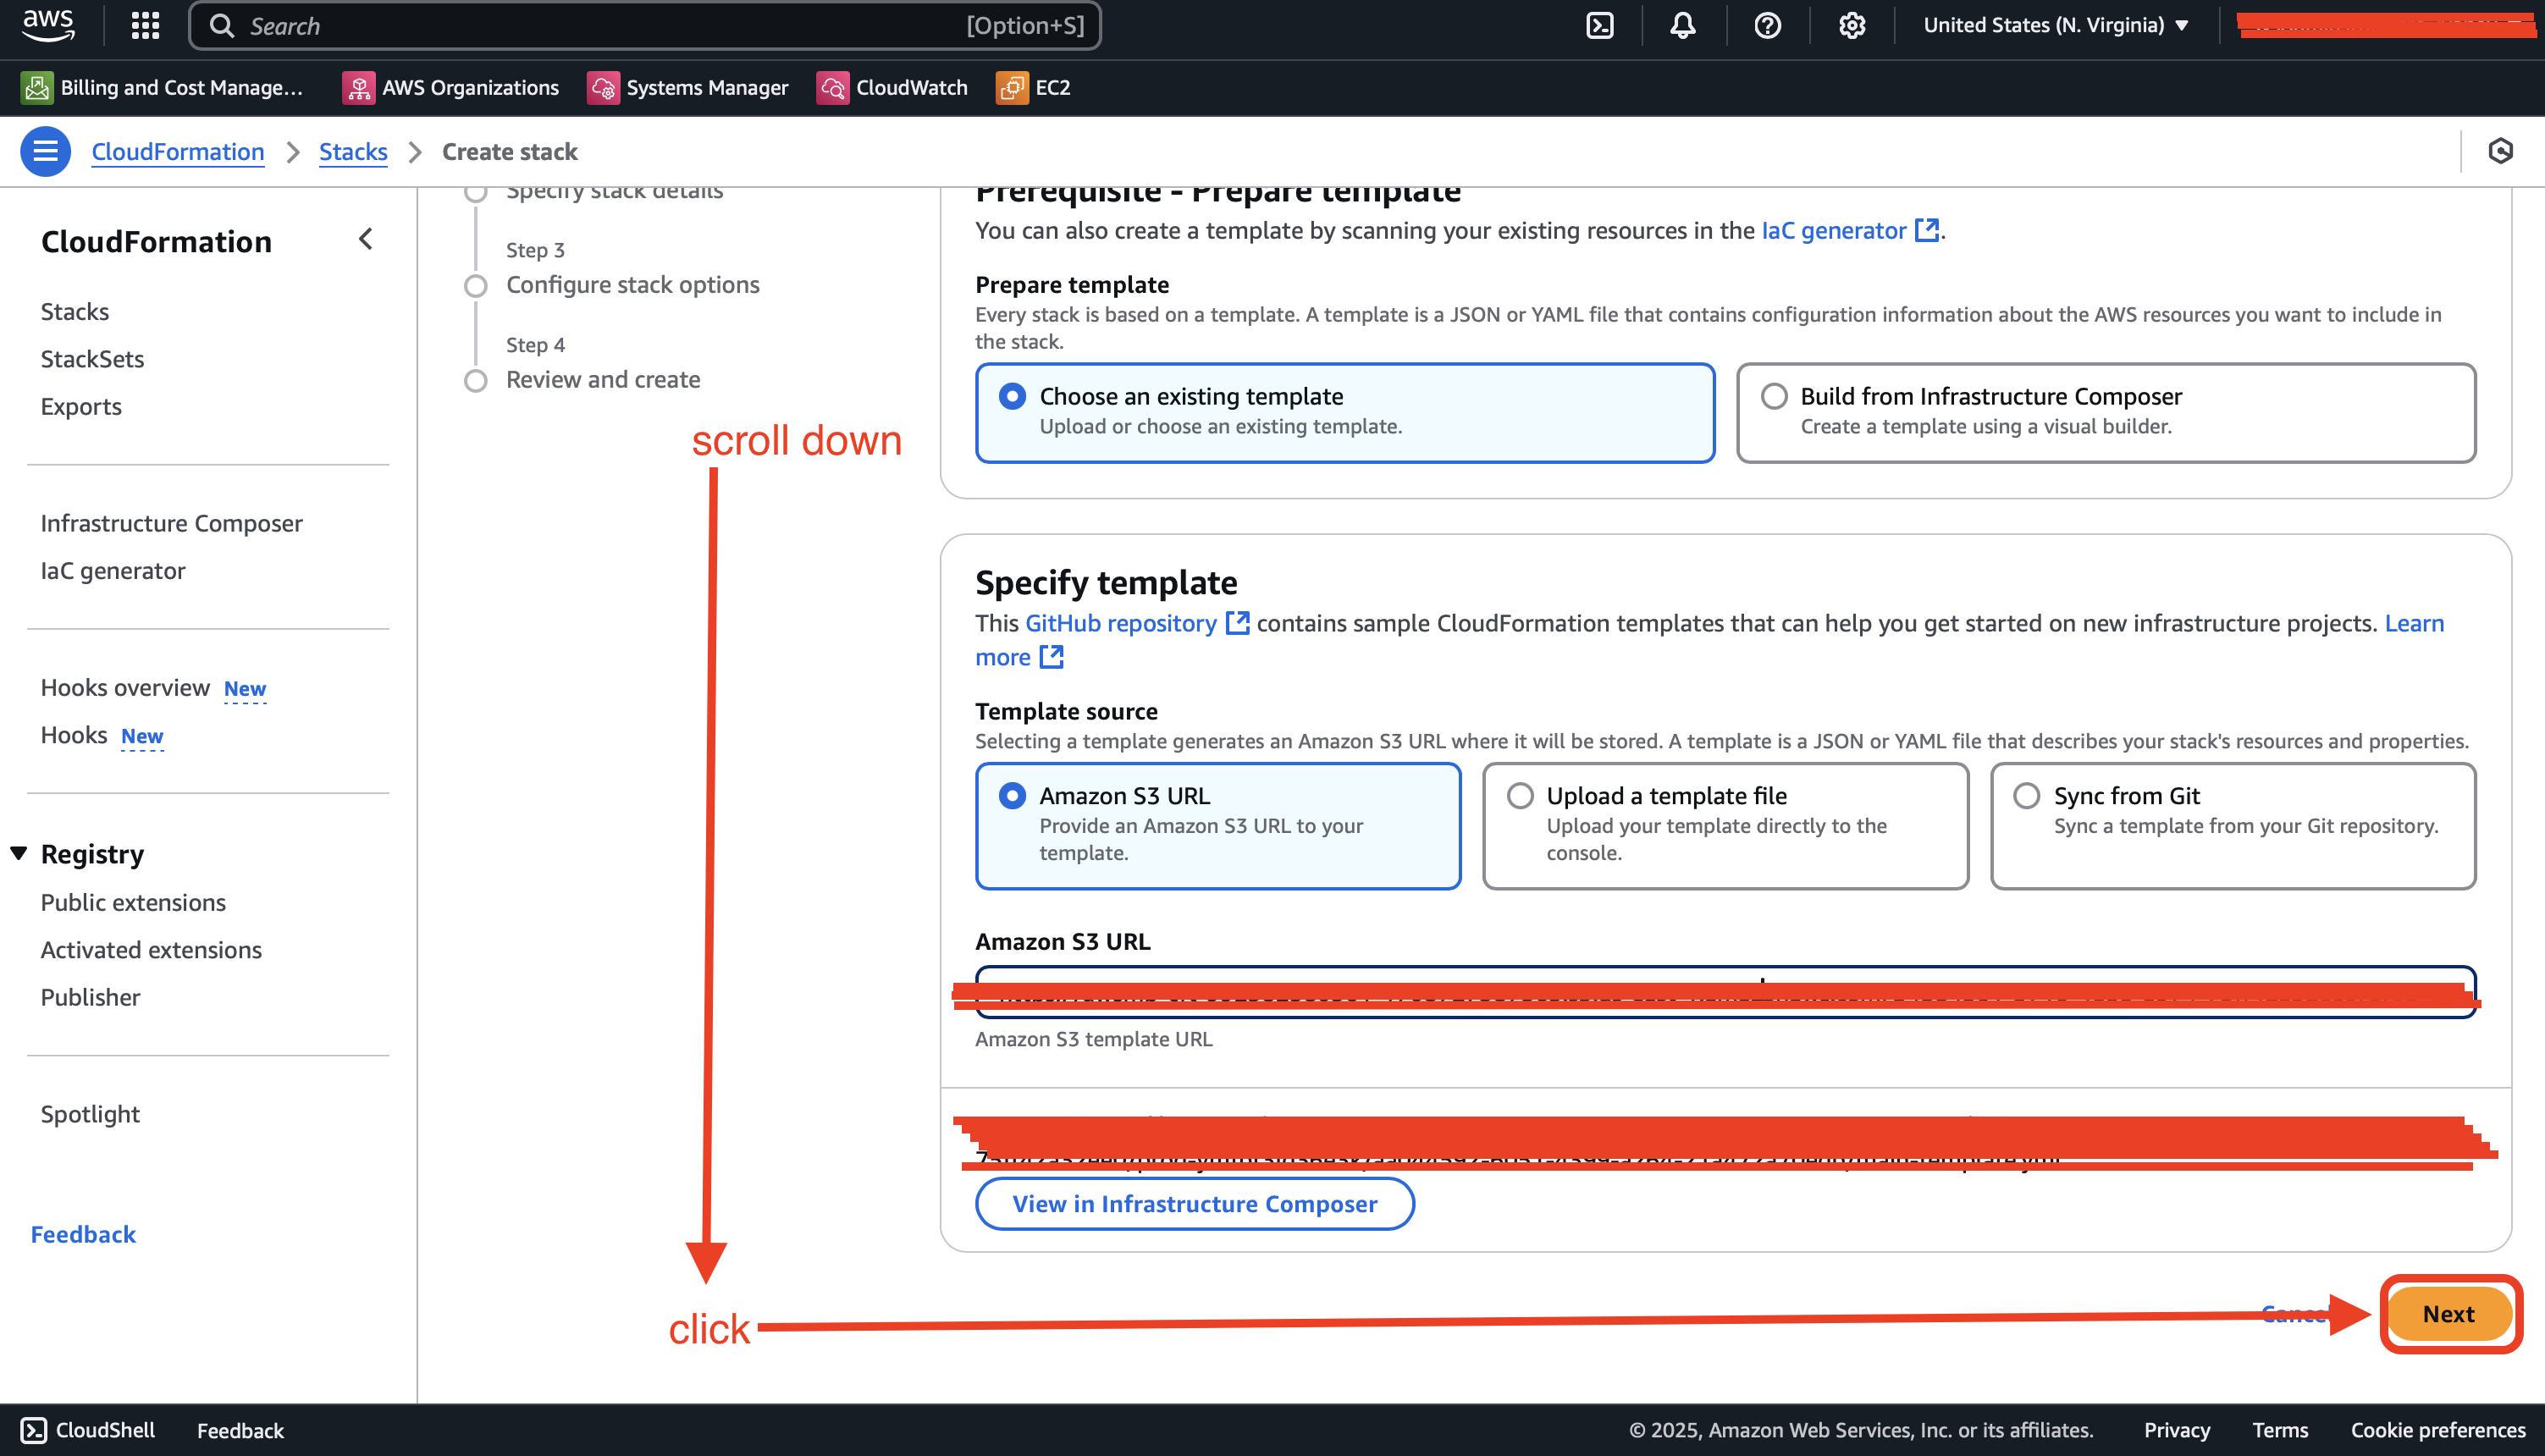
Step 2. Specify stack details
Here, you need to fill in the Stack name. You can choose any name for your stack, but we recommend using a structured format like: bookstack (e.g., wiki, docs, etc.).
For this guide, we will use wiki as an example.

There are 21 parameters, some of which are predefined. You don’t need to fill in all of them — just focus on the required and empty fields. For additional guidance, refer to the help description provided under each parameter.
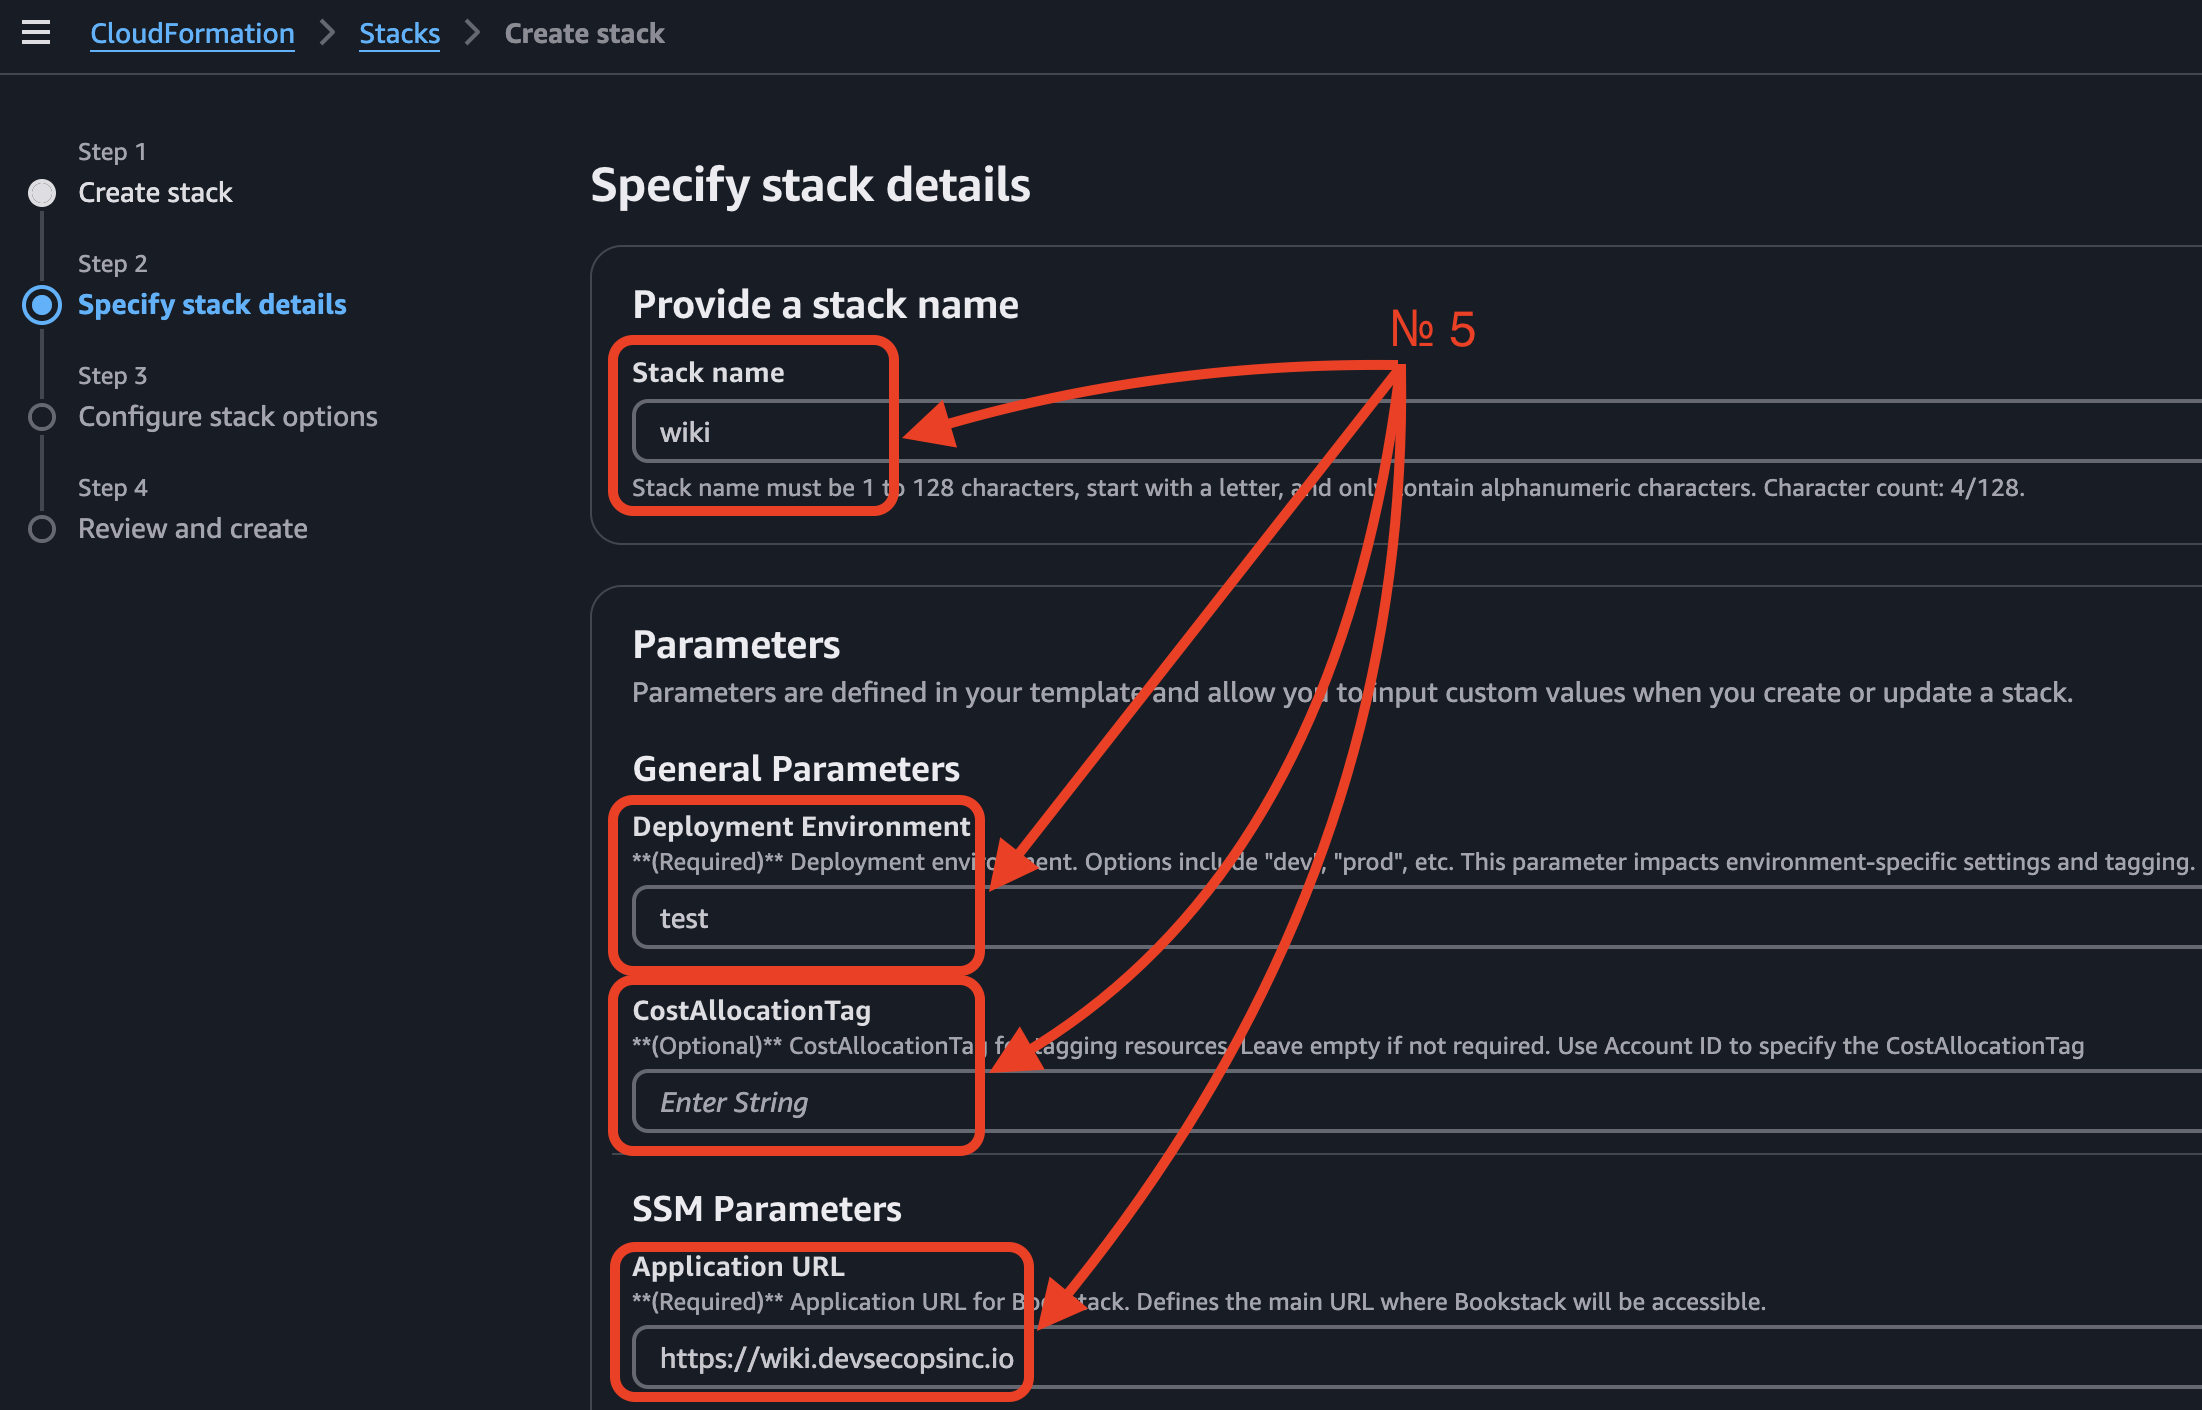
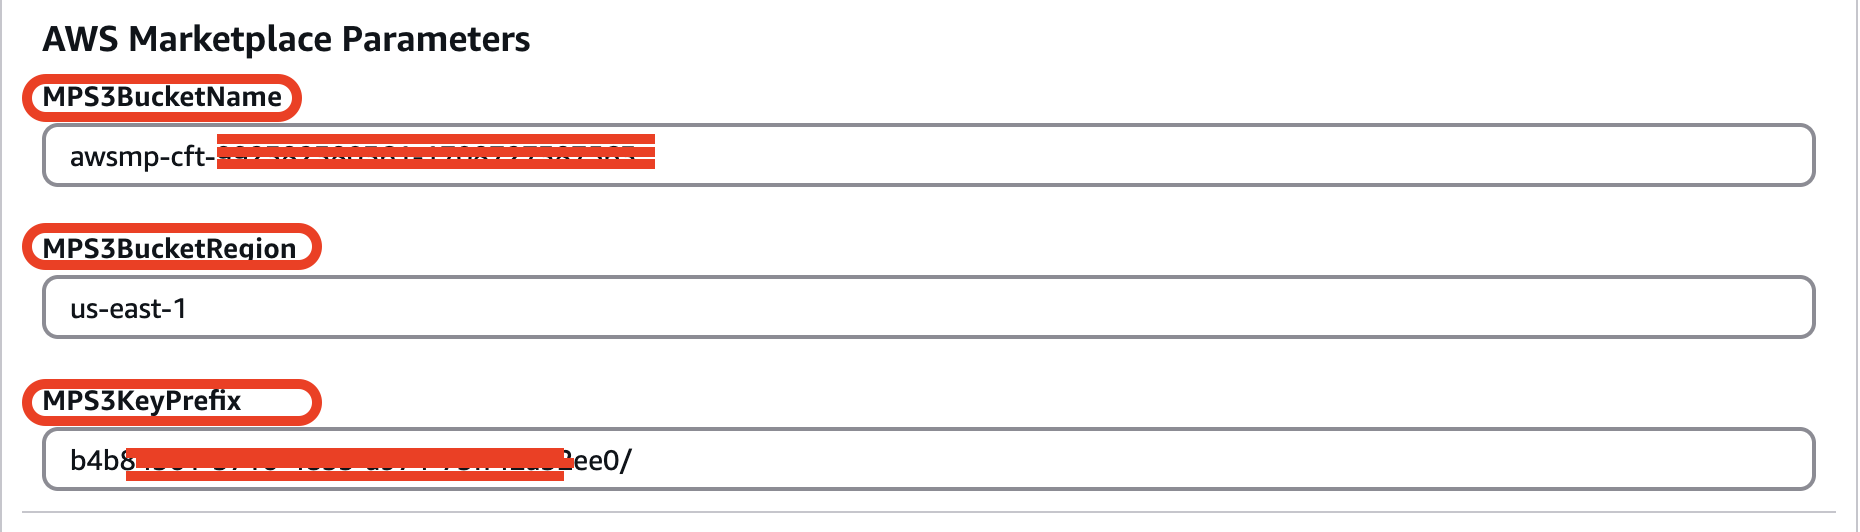
⚠ Important Notice!: There are three additional parameters for AWS Marketplace Store. They are starting from prefixes as "MPS", so you shouldn't modify them - otherwise, CloudFormation will fail with an error.
7 Required Parameters:
1. Deployment Environment – Specify the environment (e.g., dev, prod).
2. For optional parameters, you can leave the string blank, as we did with CostAllocationTag, GoogleClientId, GoogleClientSecret.
3. AppURL – Define the URL where BookStack will be accessible.
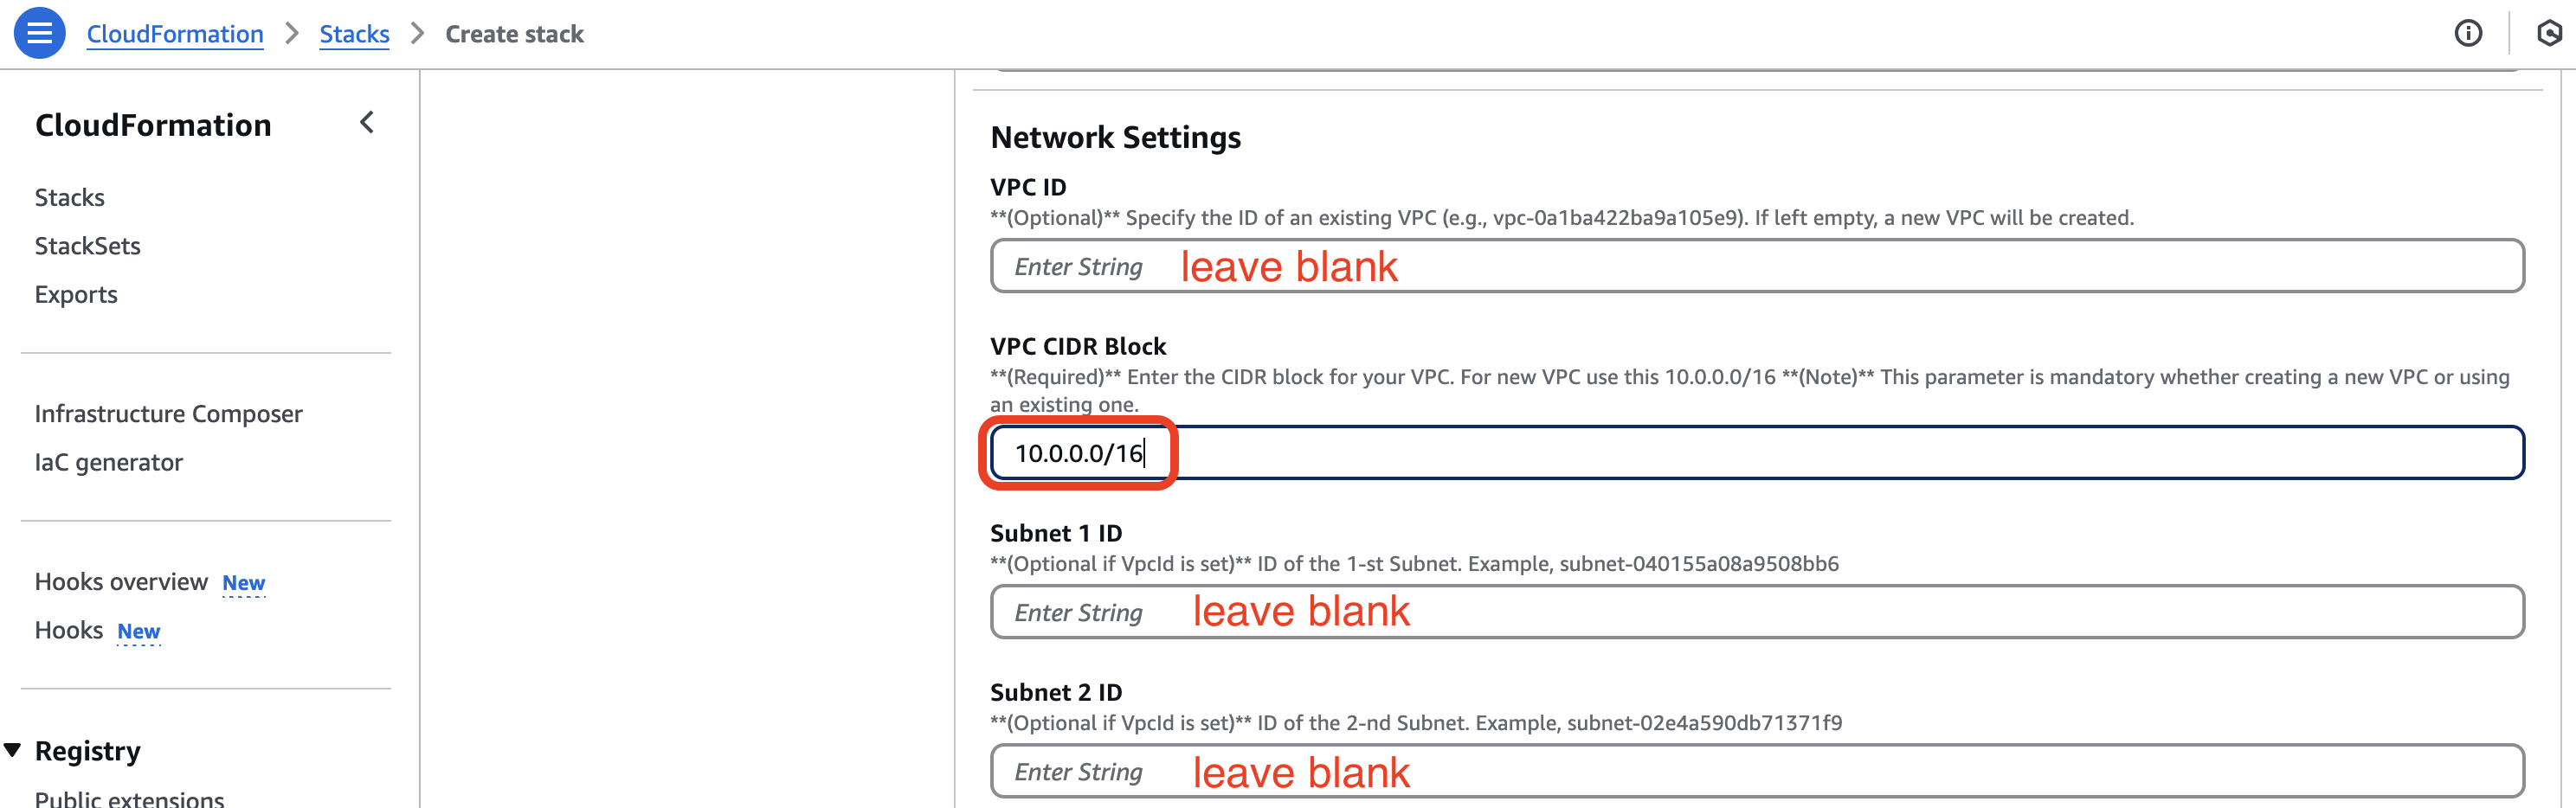
4. VPC ID – Enter the ID of an existing VPC.
5. VPC CIDR block – Provide the CIDR block of your existing VPC.
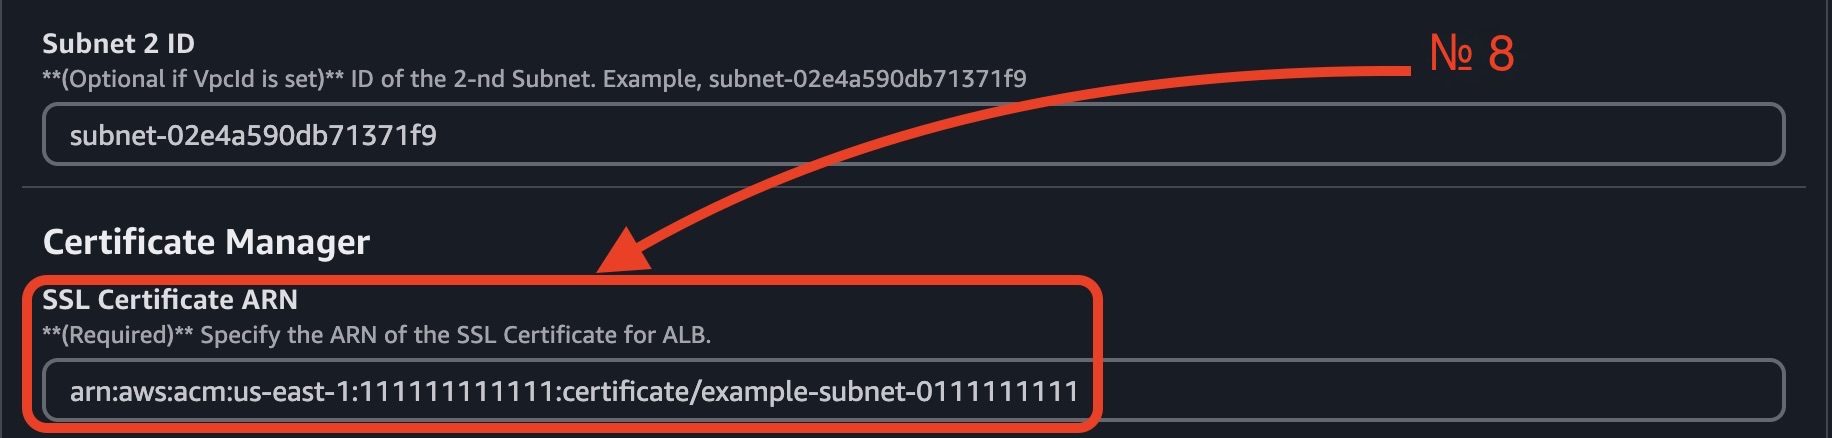
6. Subnet IDs – Enter the IDs of your existing subnets (e.g., Subnet 1 ID, Subnet 2 ID).
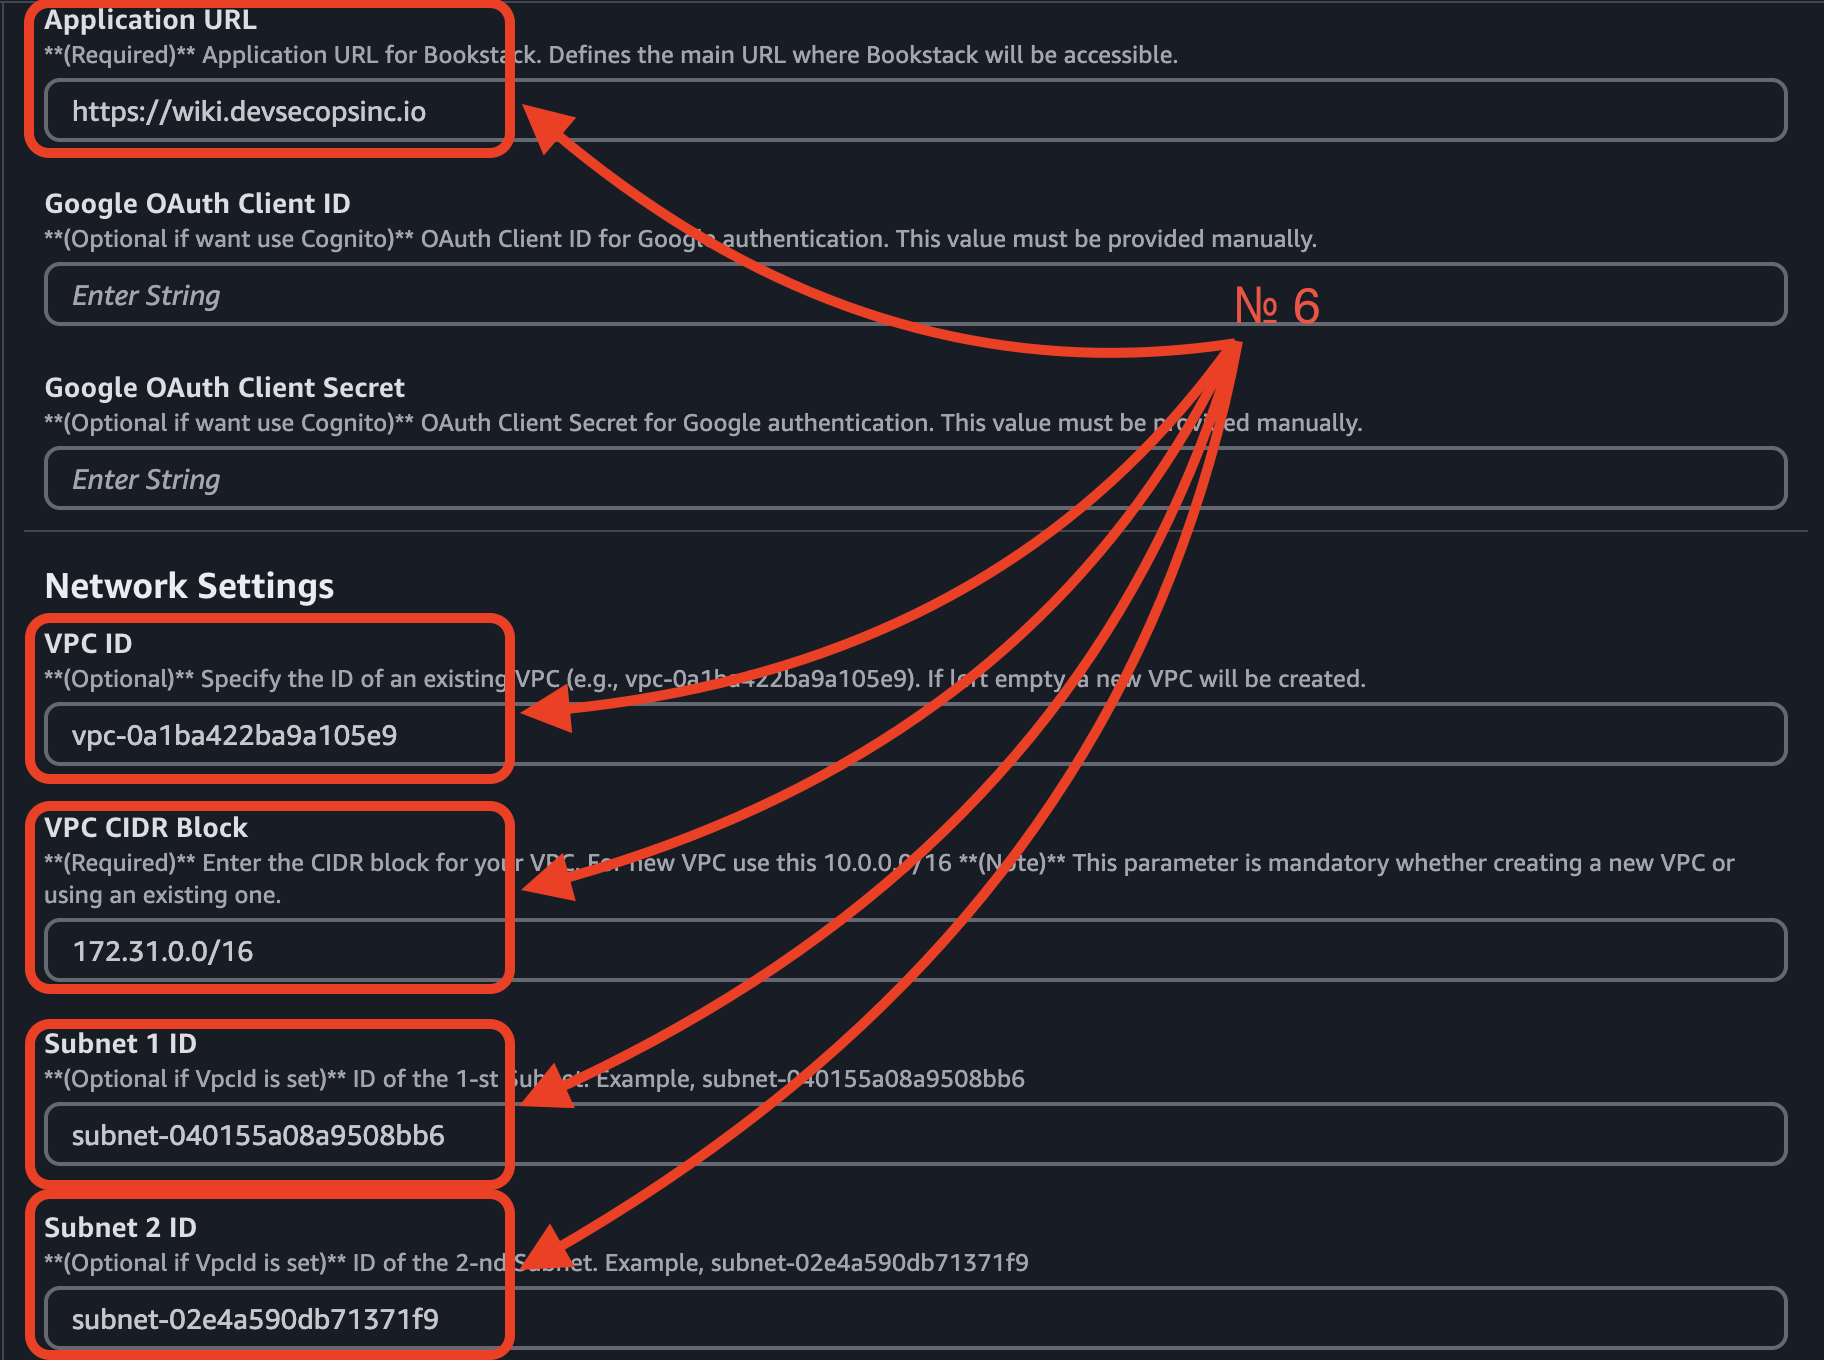
⚠ Important Notice!: If you want to create new VPC, you should fill ONLY the VPC CIDR Block.
7. EnableUserSignUp, MultipleAuthMethods - by default set to false for best security practices.

8. SSL Certificate ARN – Provide the ARN of your SSL Certificate for the ALB. (If you don’t have one, you must create it.)
⚠ Important Notice!: There is one required parameter for EC2AMI. Its value is set to "/aws/service/marketplace/prod-ymfbr3id36e3k/version-v1.0-bookstack-v24.05.4", so you shouldn't modify it - otherwise, CloudFormation will fail with an error.

Override Optional Parameters
Some parameters have predefined default values. You can modify them as needed or leave them unchanged:
• EC2 instance type (t4g.small is the default and is recommended for small environments).
• RDS DB instance type (db.t4g.small is the default).
• RDS storage size (20 GB by default).
• Multi-AZ deployment (set to false for cost efficiency).
• Enable/Disable RDS backups.
• Enable/Disable RDS deletion protection. ⚠ Important Notice!: If this parameter is enabled, you will not be able to delete the stack. To proceed with deletion, go to AWS Console → Amazon RDS → Databases, select your database, click Modify, and uncheck "Enable deletion protection" for bookstack-dev-rds. After this, you can delete the main stack in CloudFormation.
• Schedule backup rules.
• Schedule backup deletion.
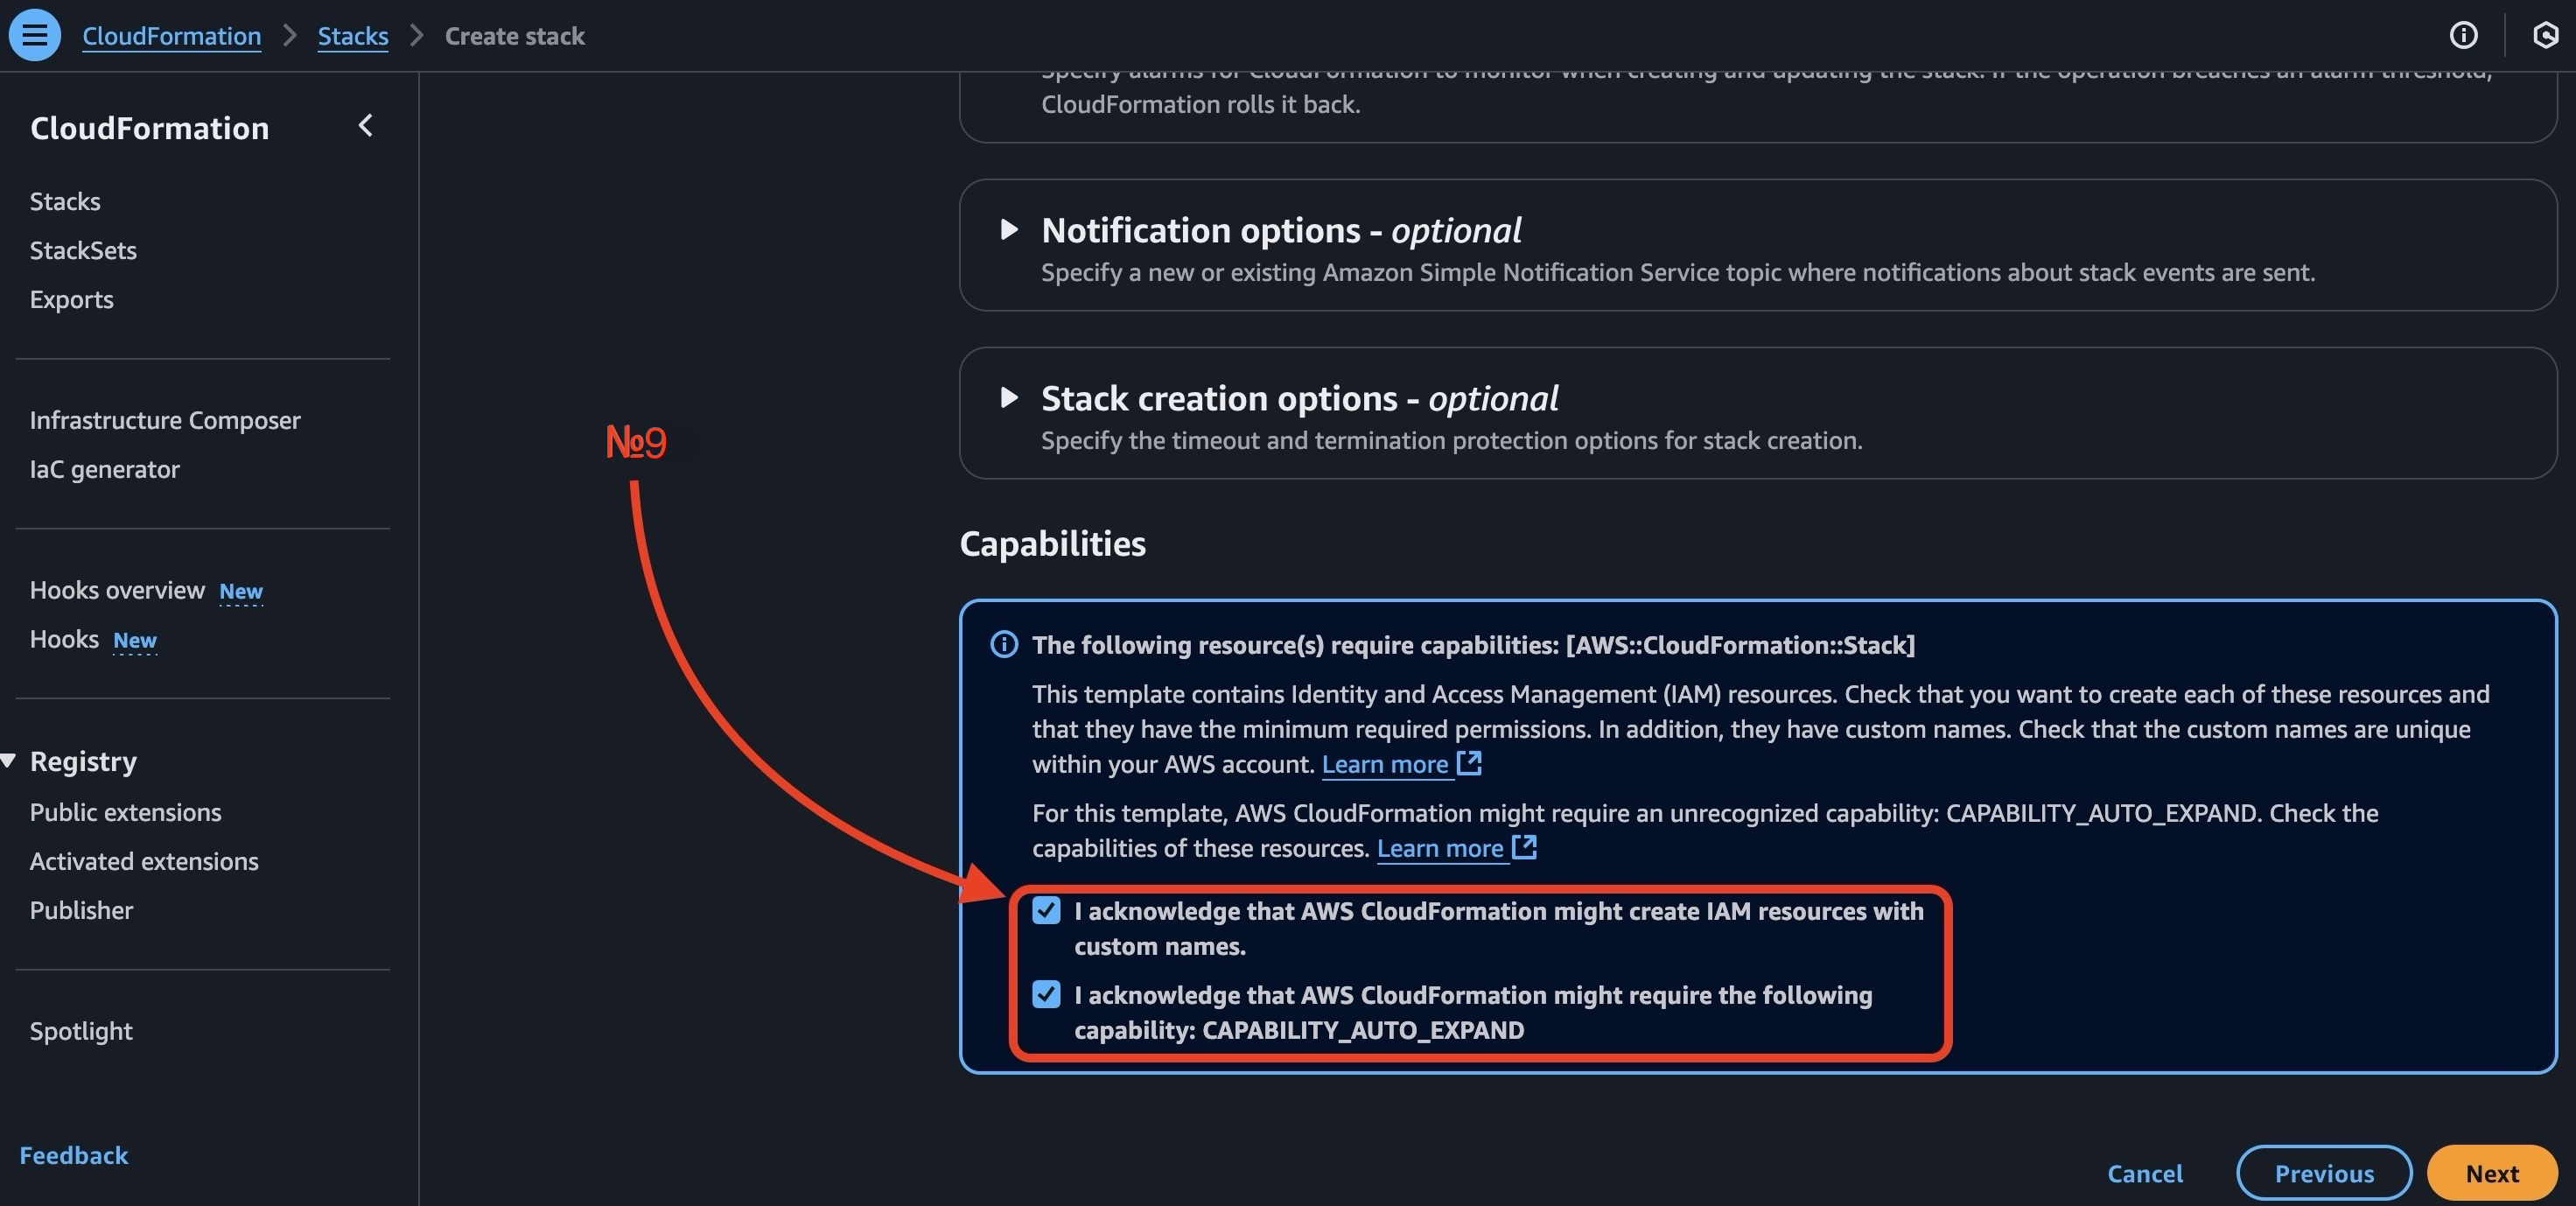
Step 3. Configure stack options
Scroll to the bottom, check both checkboxes in the Capabilities field, and click the Next button.
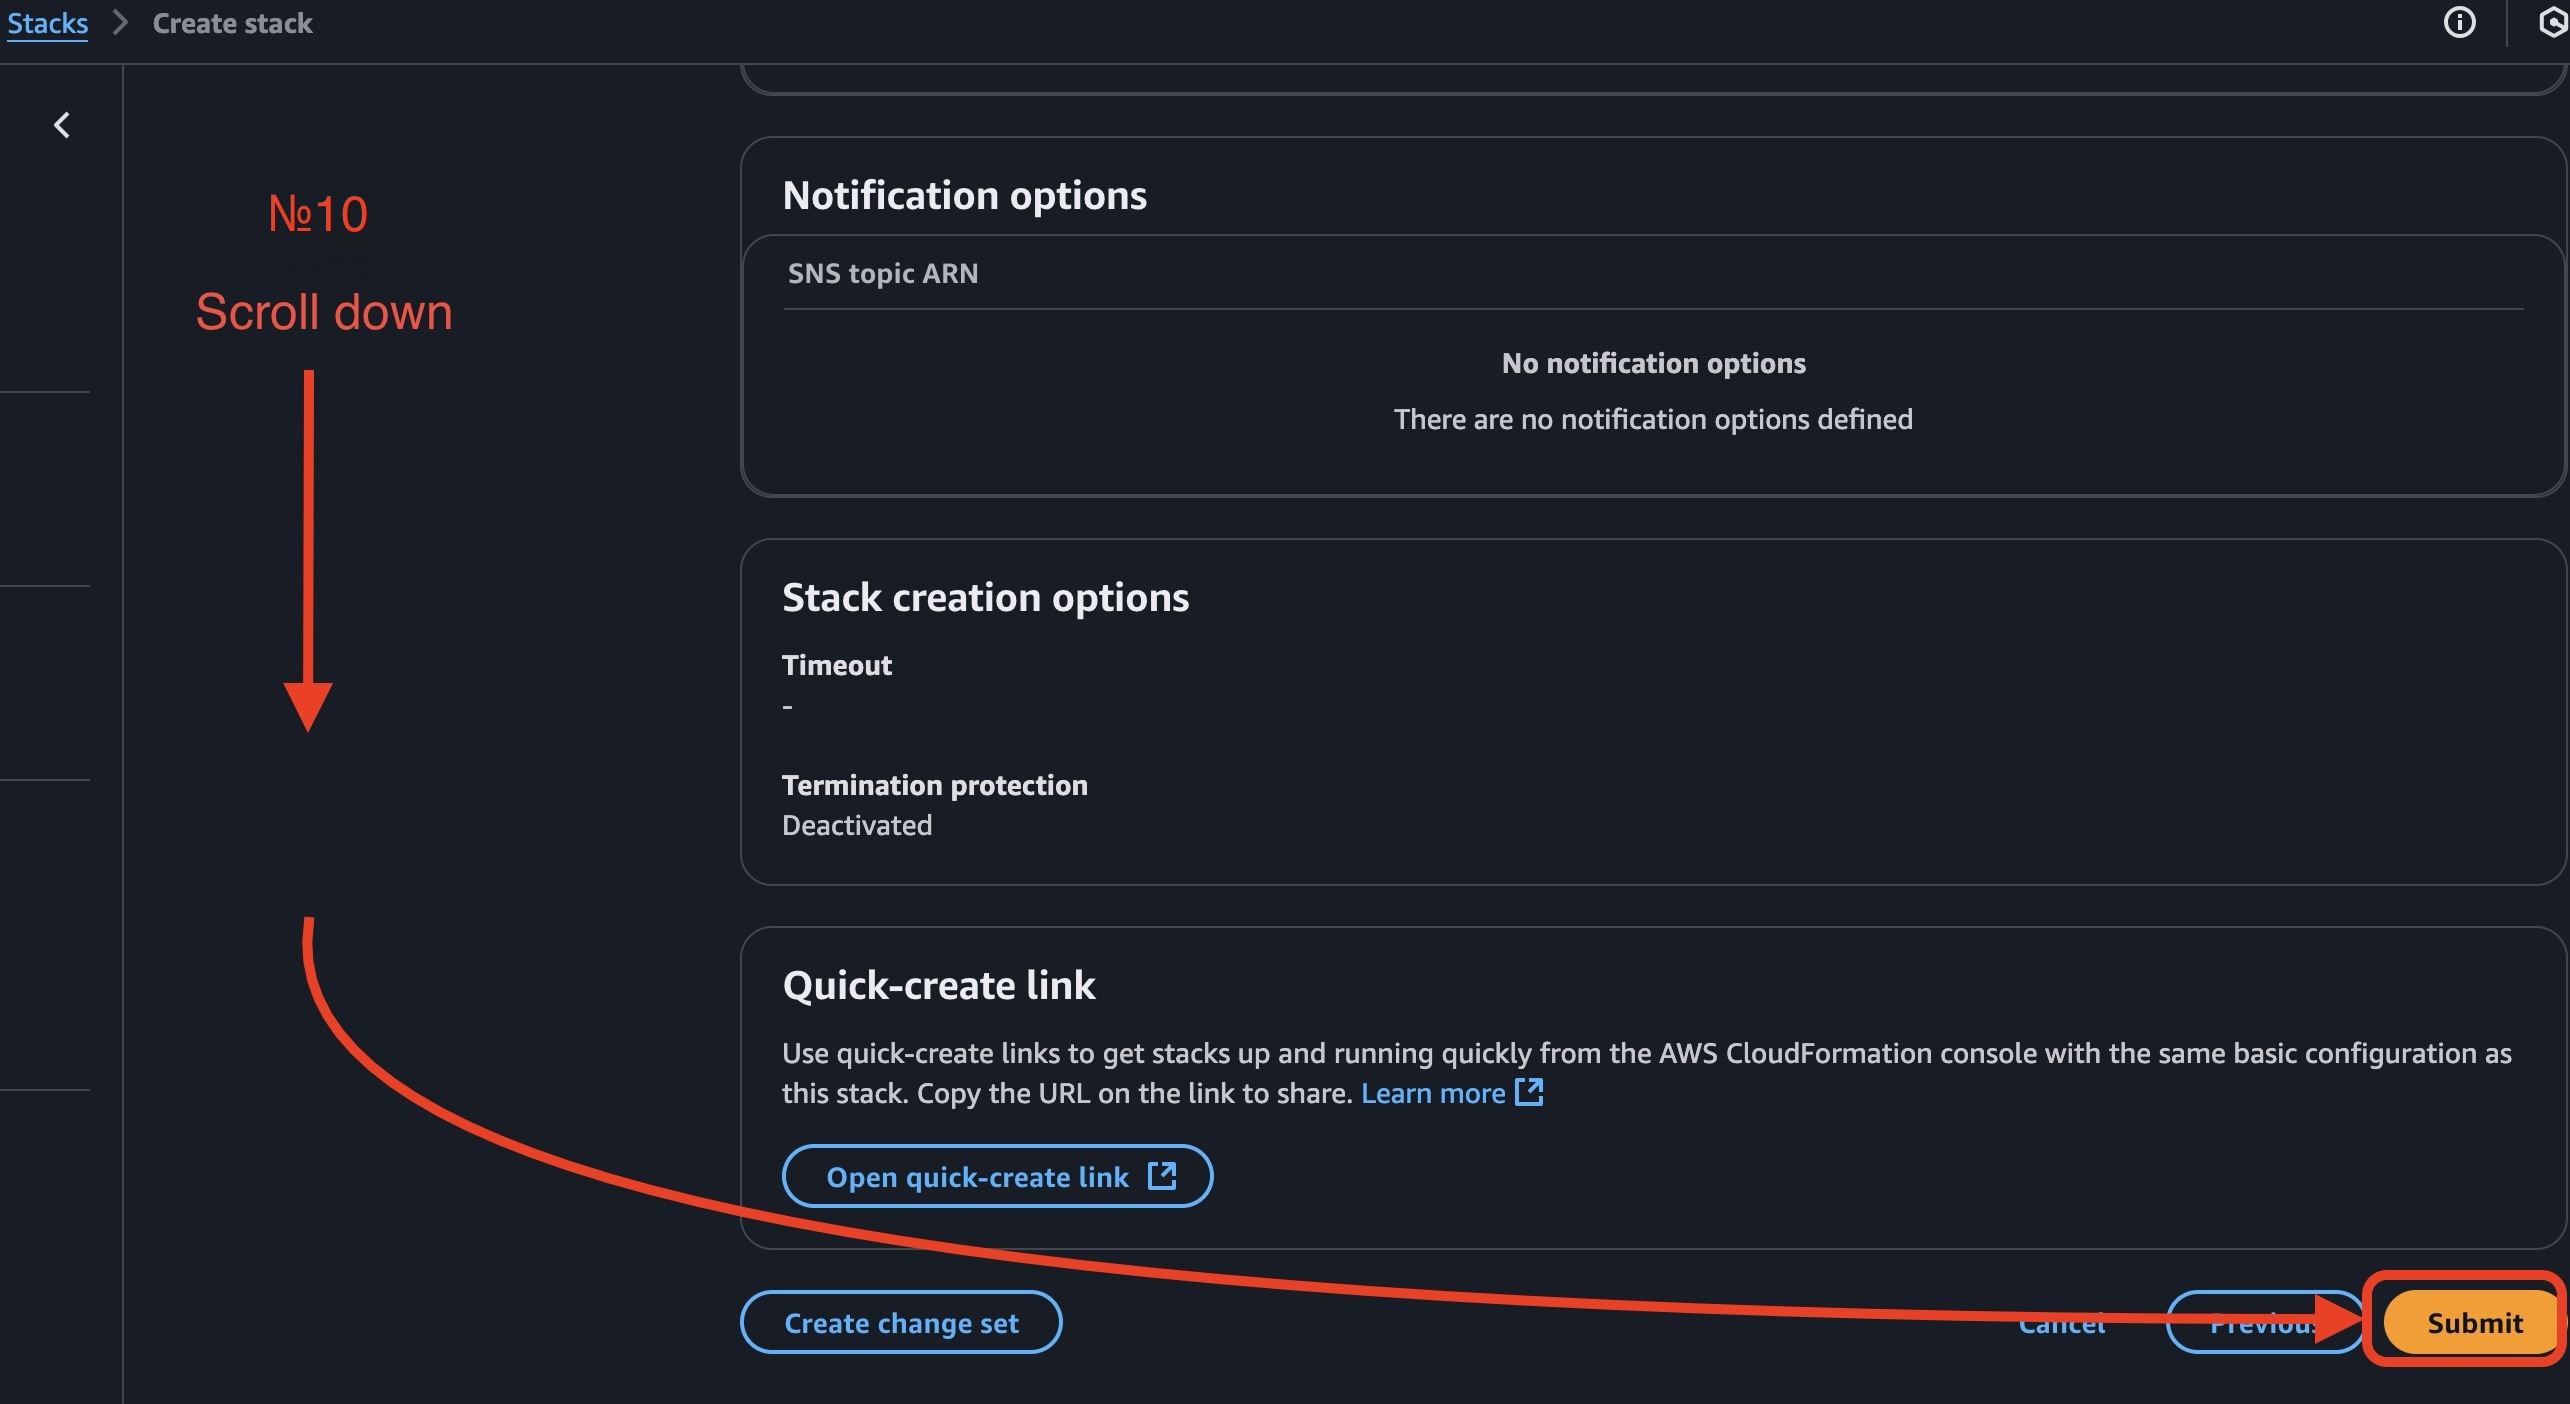
Step 4. Review and create
Scroll to the bottom and click the Submit button.
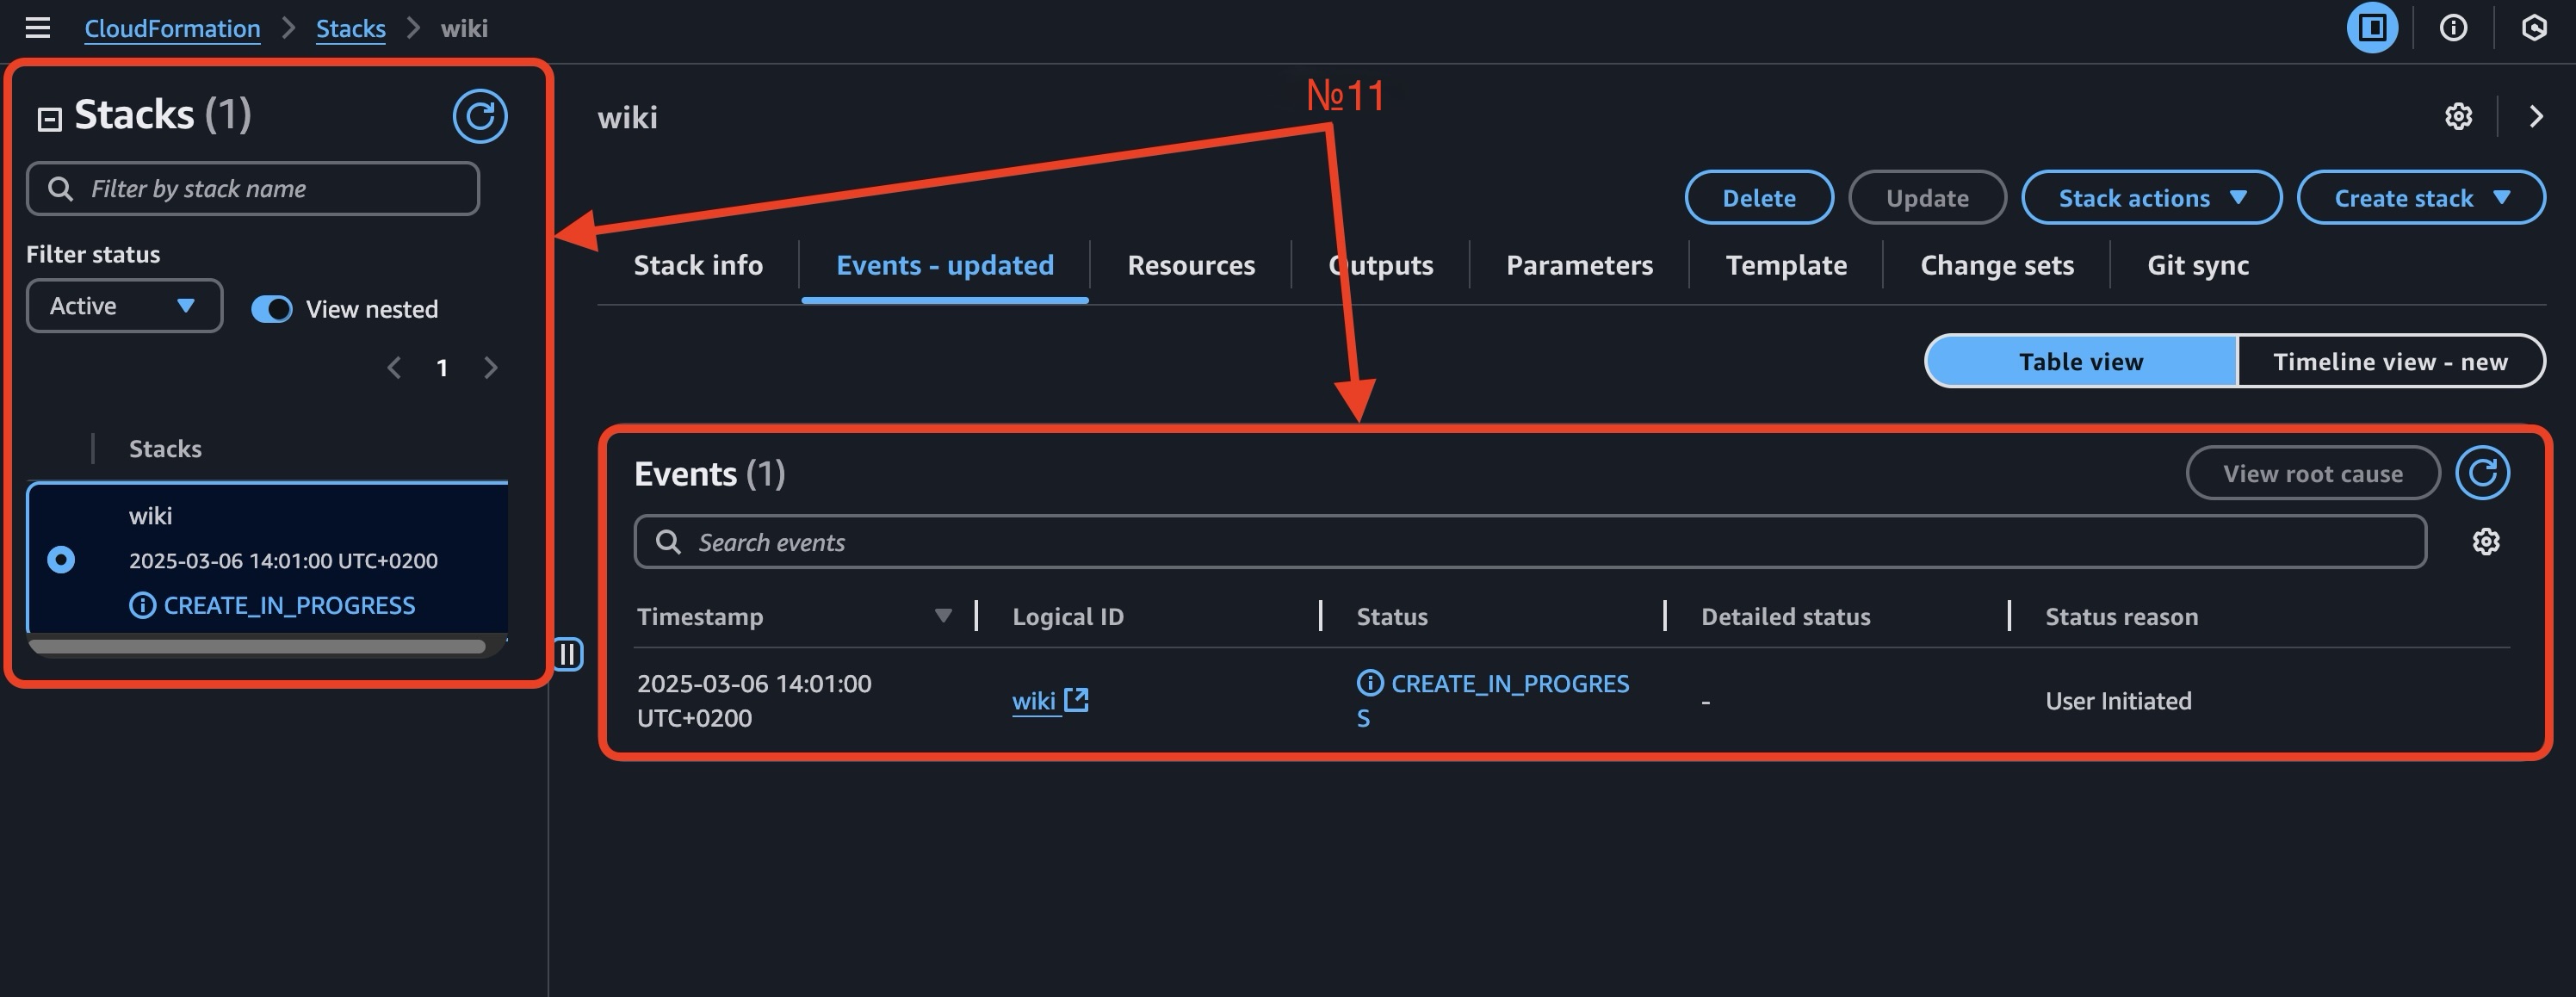
Now you can see how your environment is being deployed.
Follow these simple steps to access your product:
1️⃣ Retrieving the Access URL
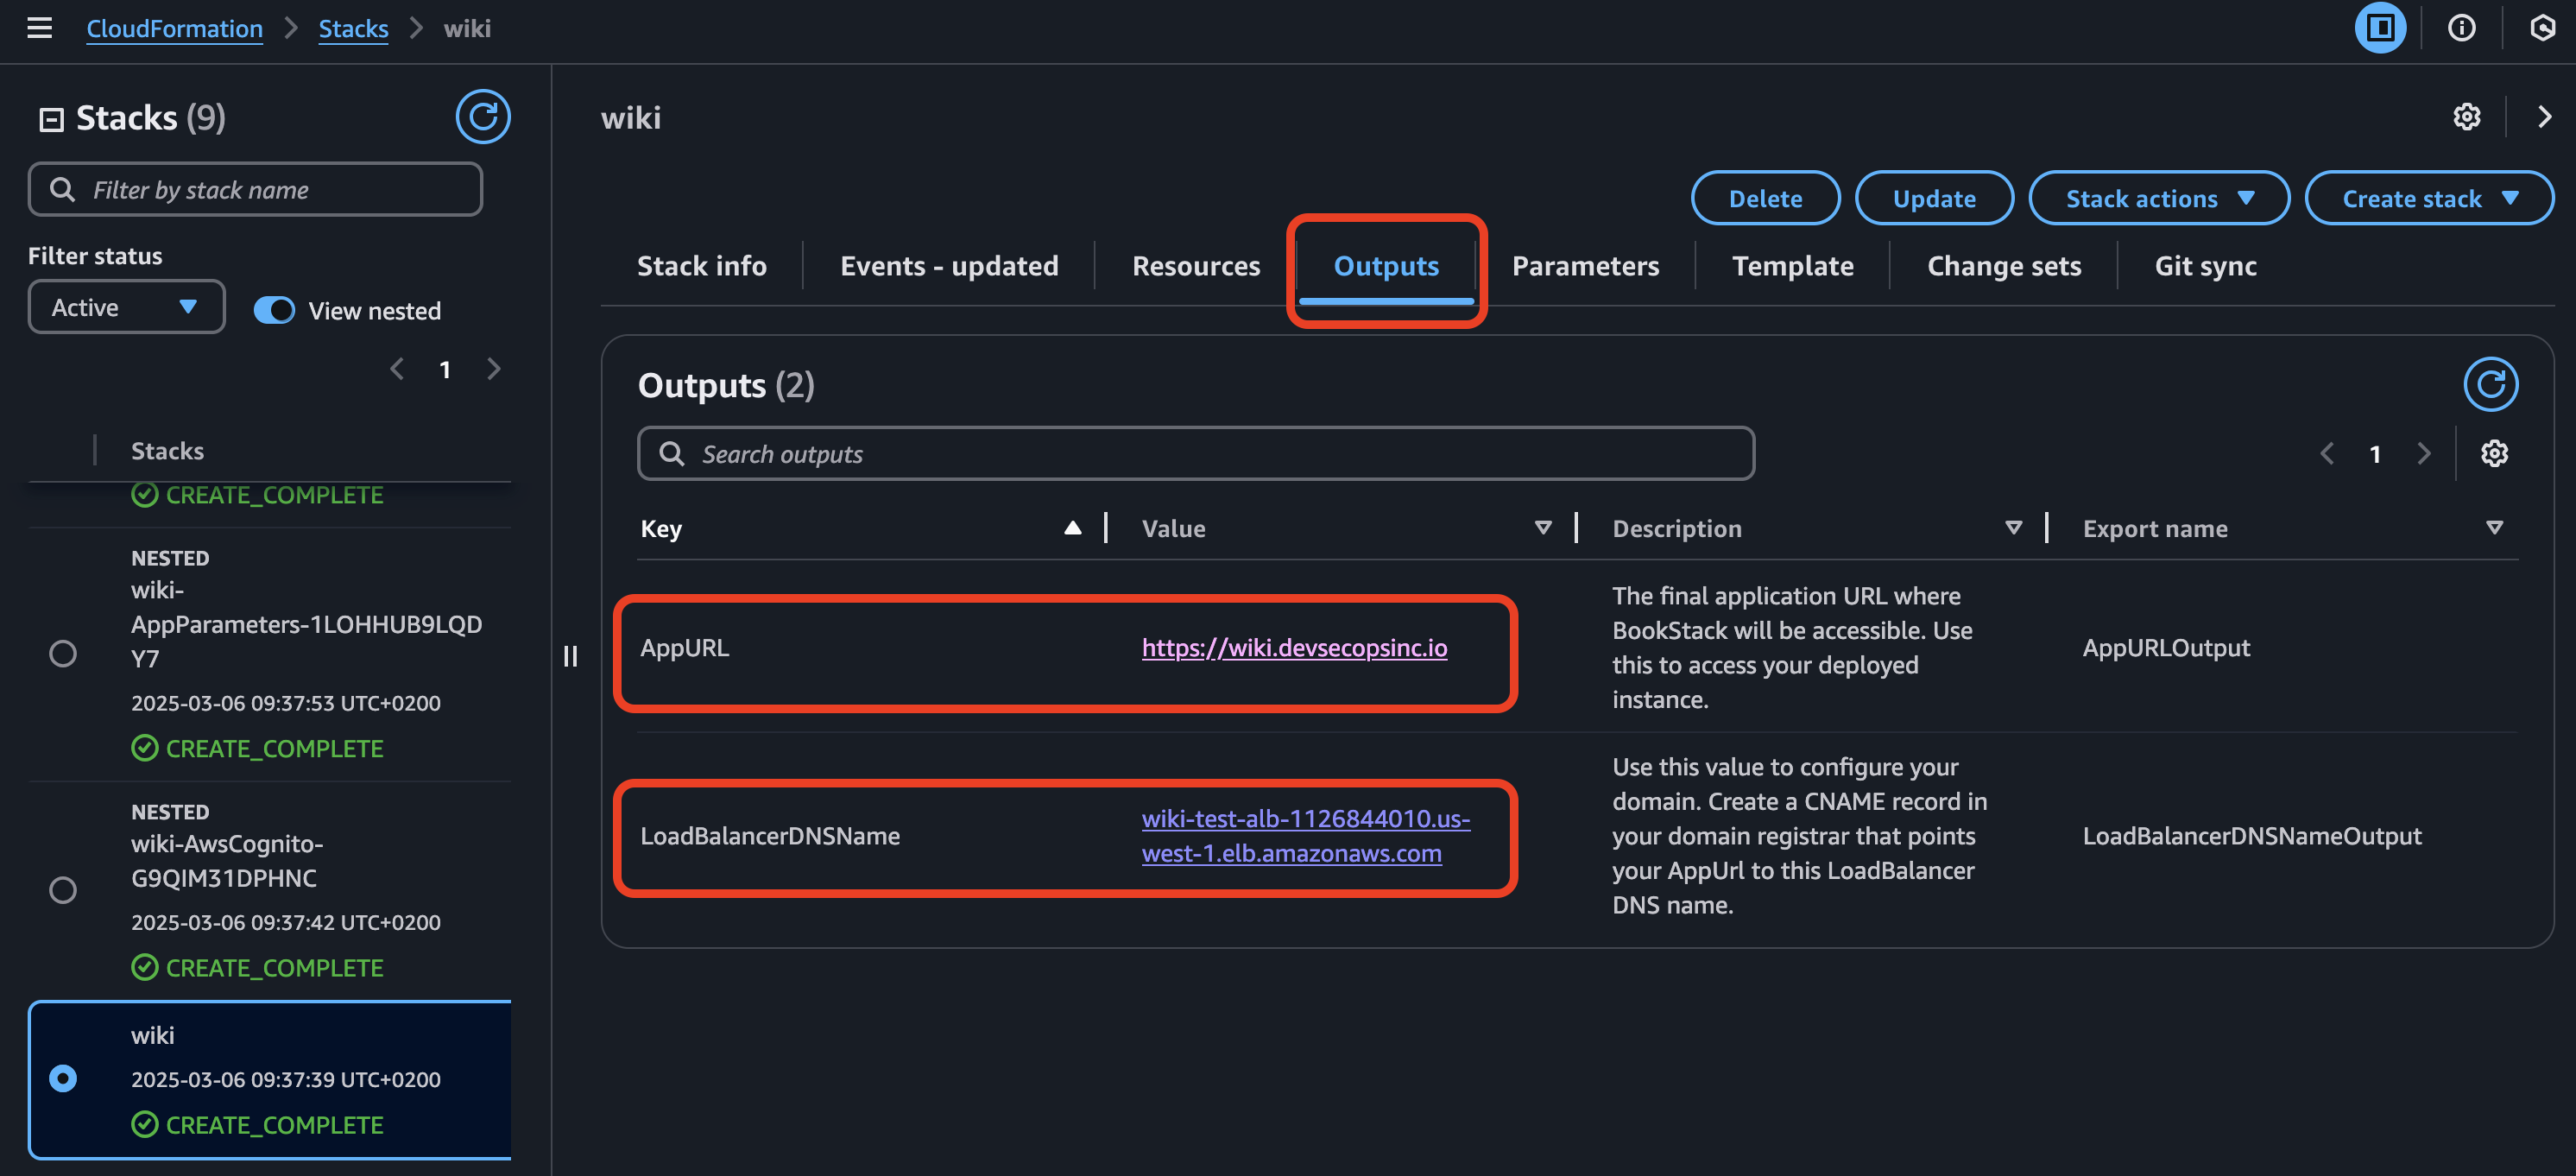
1. After successful deployment, your product will be available at a generated URL, which can be found in the bookstack-$Environment-main stack under the Outputs section, key LoadBalancerDNSName, key AppURL.
2. In your domain registrar, create a CNAME record for AppURL, pointing to the generated LoadBalancerDNSName.
3. Open AppURL in your browser and enjoy!
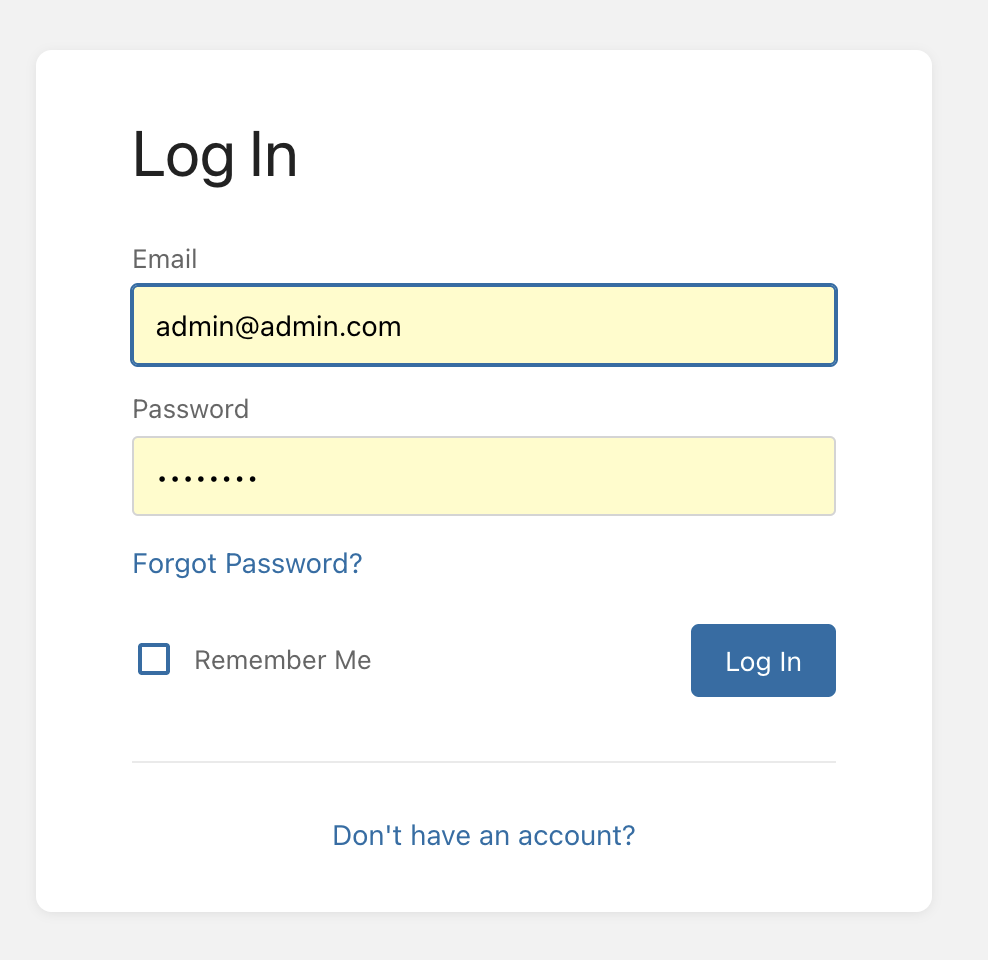
2️⃣ Accessing BookStack
1. Open AppURL in your browser.
2. Log in using the default credentials:
• Username: admin@admin.com
• Password: password
3. Change your password immediately! You can do this under Profile → Settings.
Additional Information
✅ Application logs are available in CloudWatch Logs.
✅ Data is stored in RDS, while Bookstack files are stored on Amazon EFS.
✅ Deletion: If needed, delete the main CloudFormation Stack to remove all associated resources automatically.
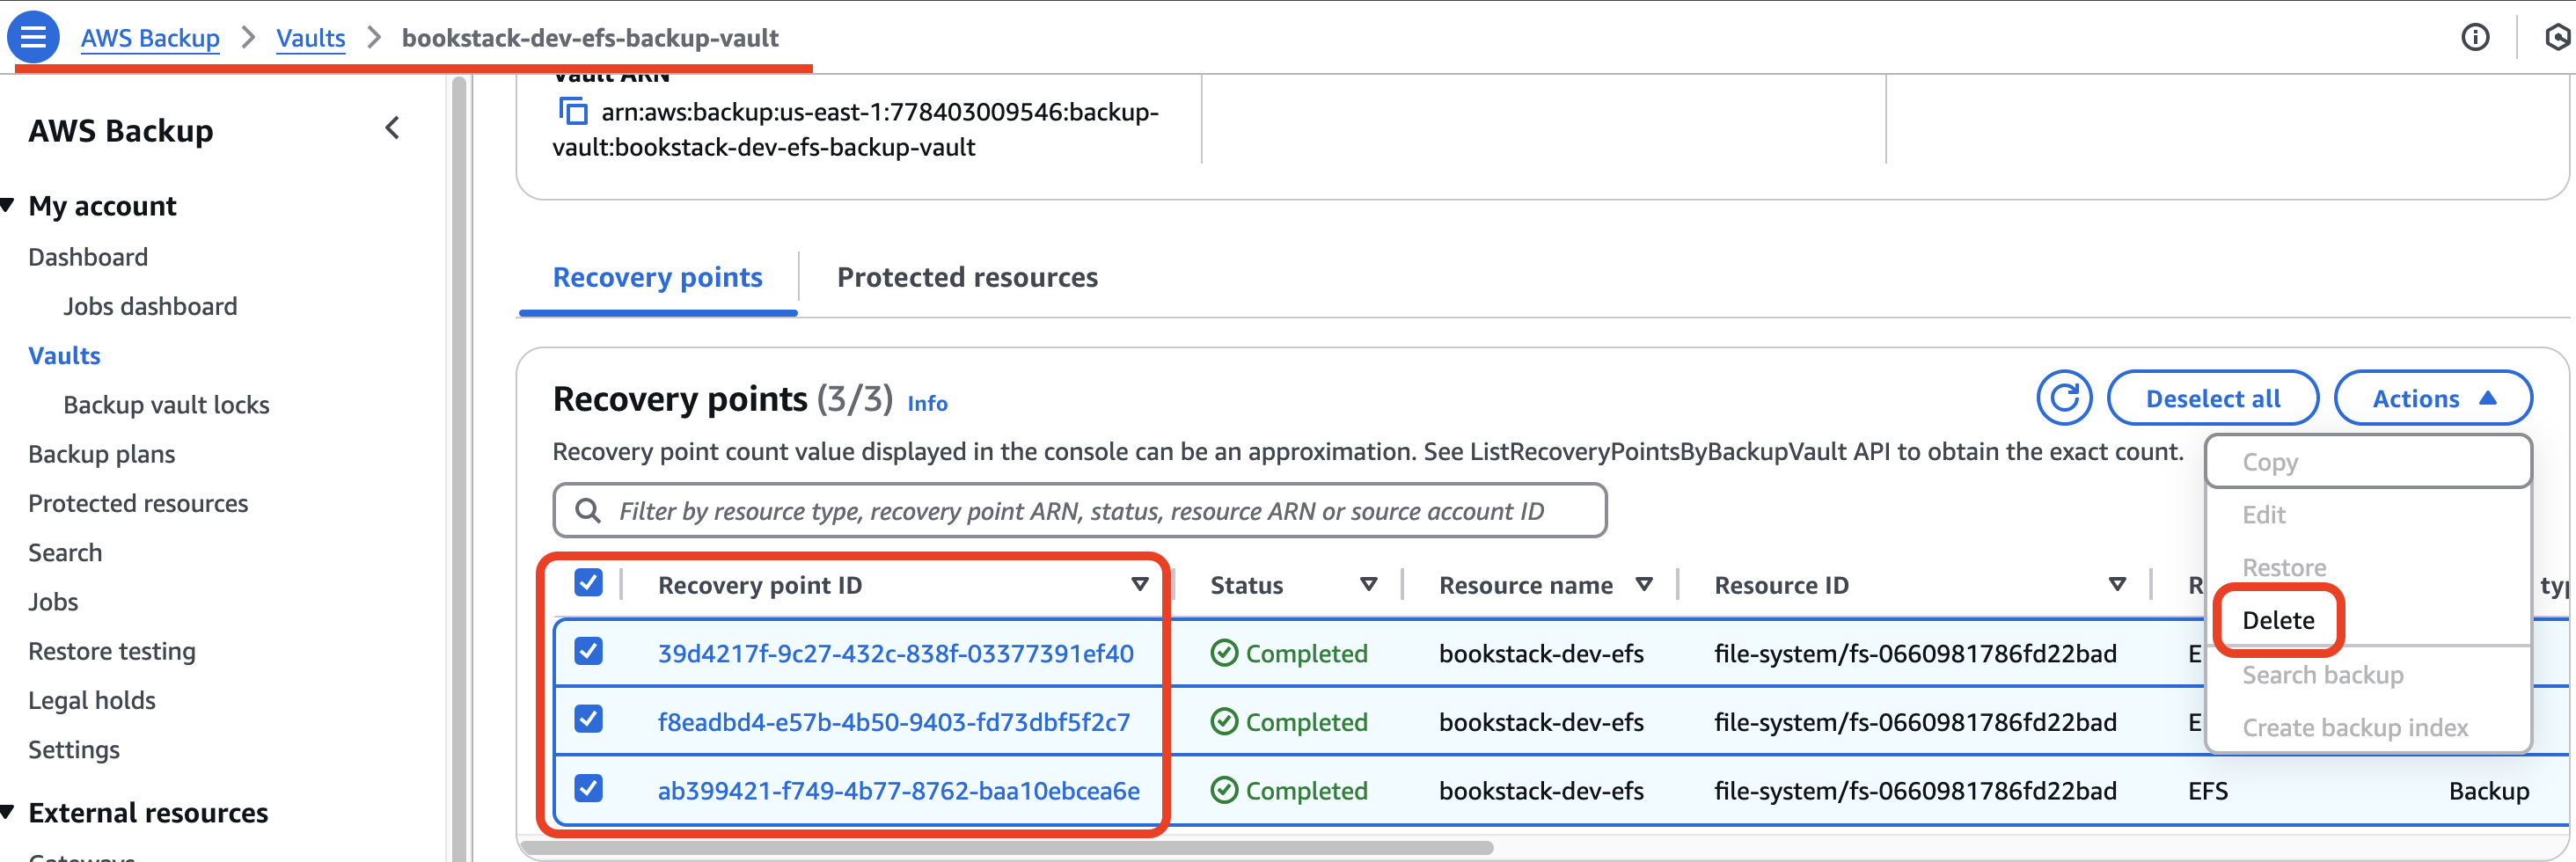
⚠ Important Notice! Before proceeding, navigate to AWS Backup → Vaults → your-backup-vault-name → Recovery Points. Select all recovery points, click the Actions button, and choose Delete. This will remove all EFS backups.
Otherwise, deleting the CloudFormation stack will result in an error.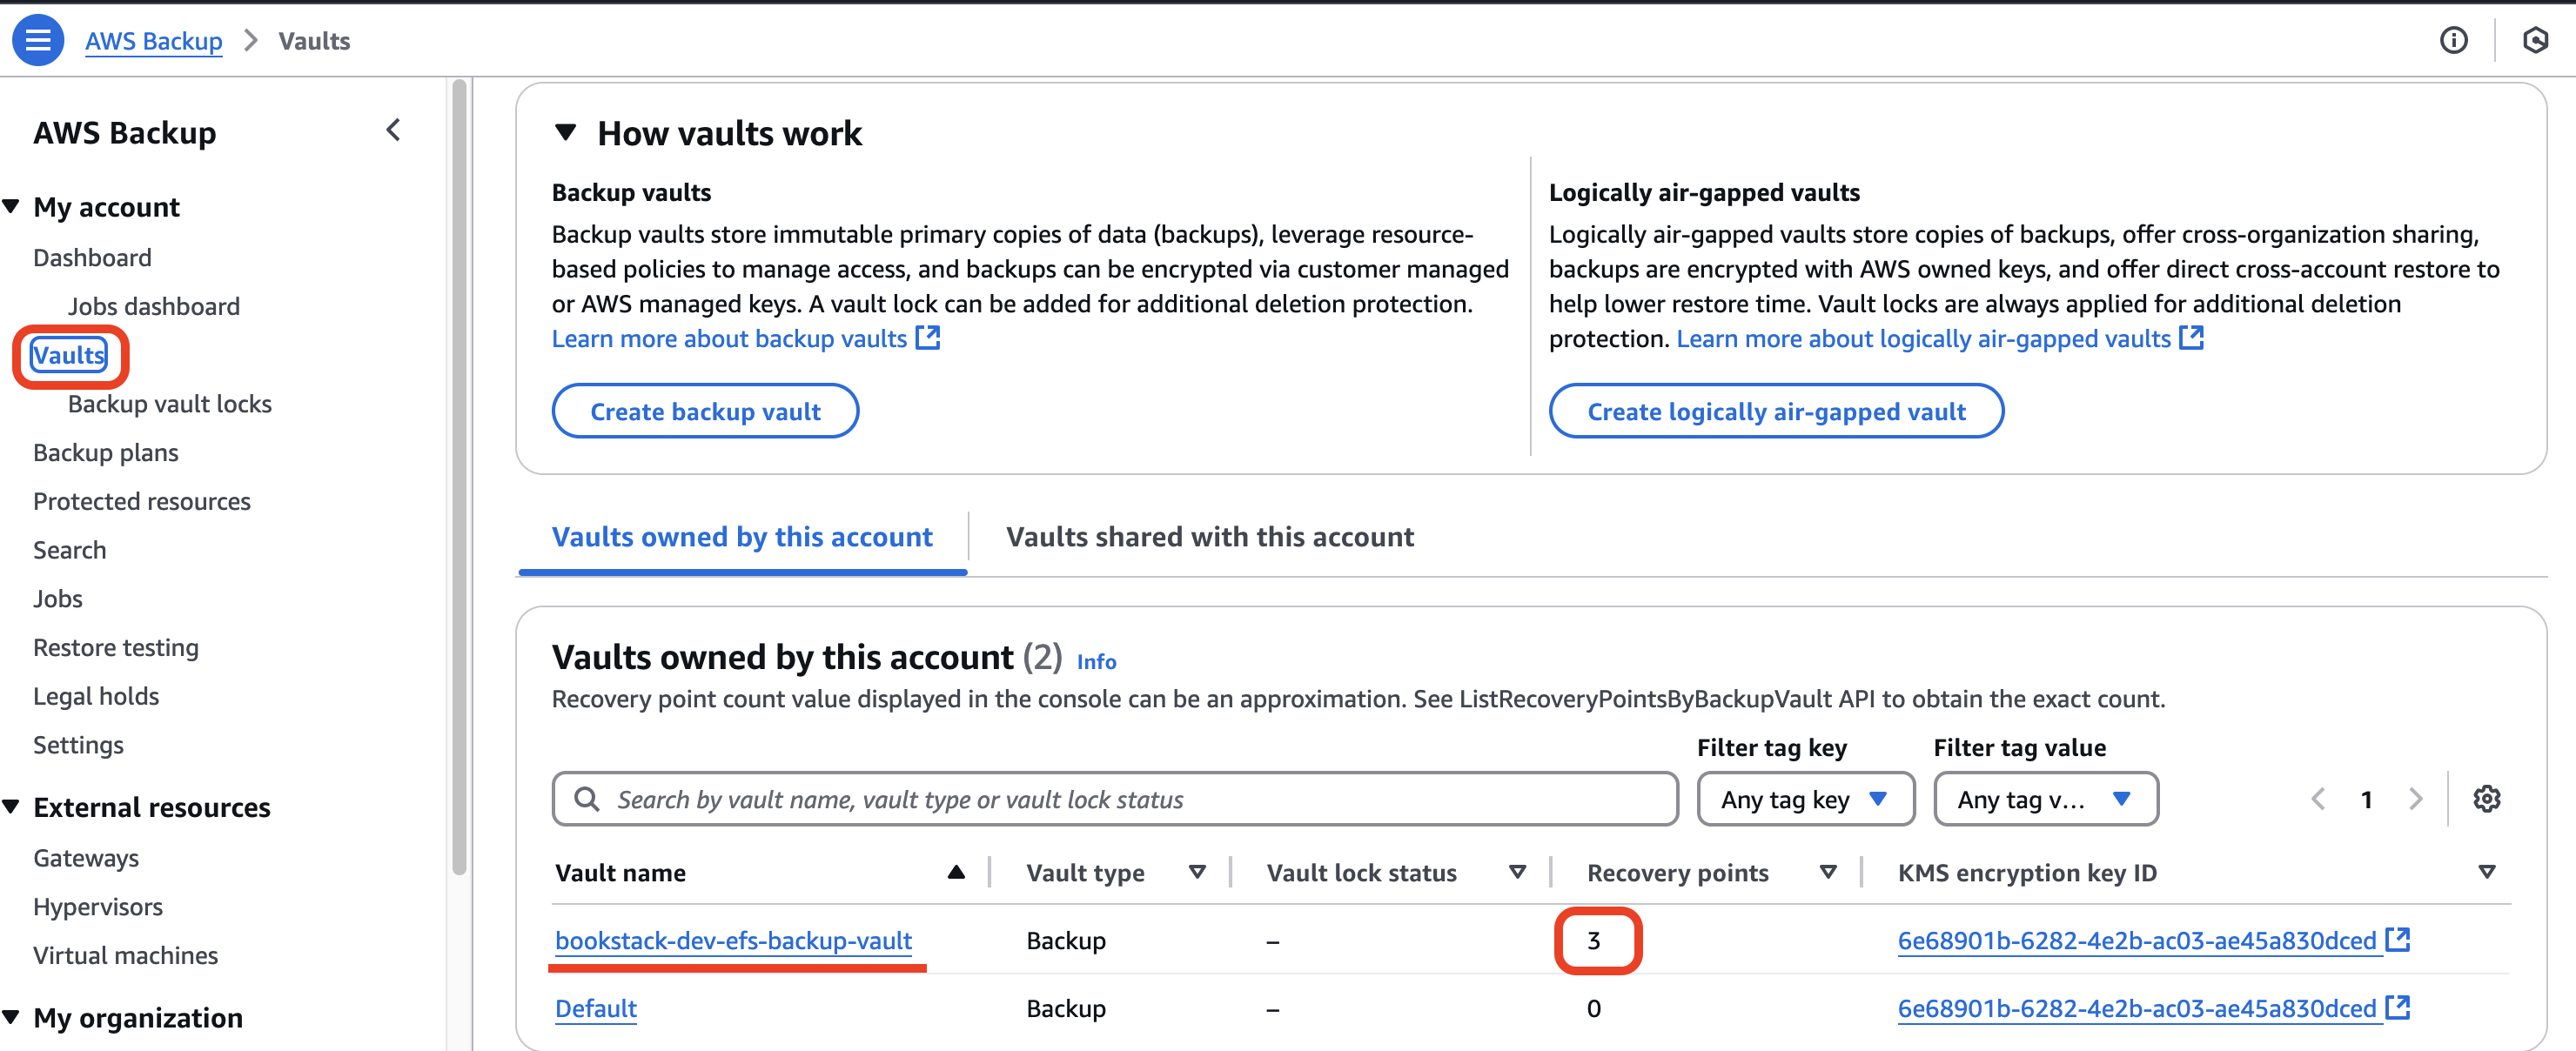
ℹ️ Additional Information:
Some minor issues may occur during the initial launch, which are known and documented. Please visit the BookStack Bugs and Known Issues section for more information.
No Comments